How to Do a Turkish Get-Up

How to Do a Turkish Get-Up

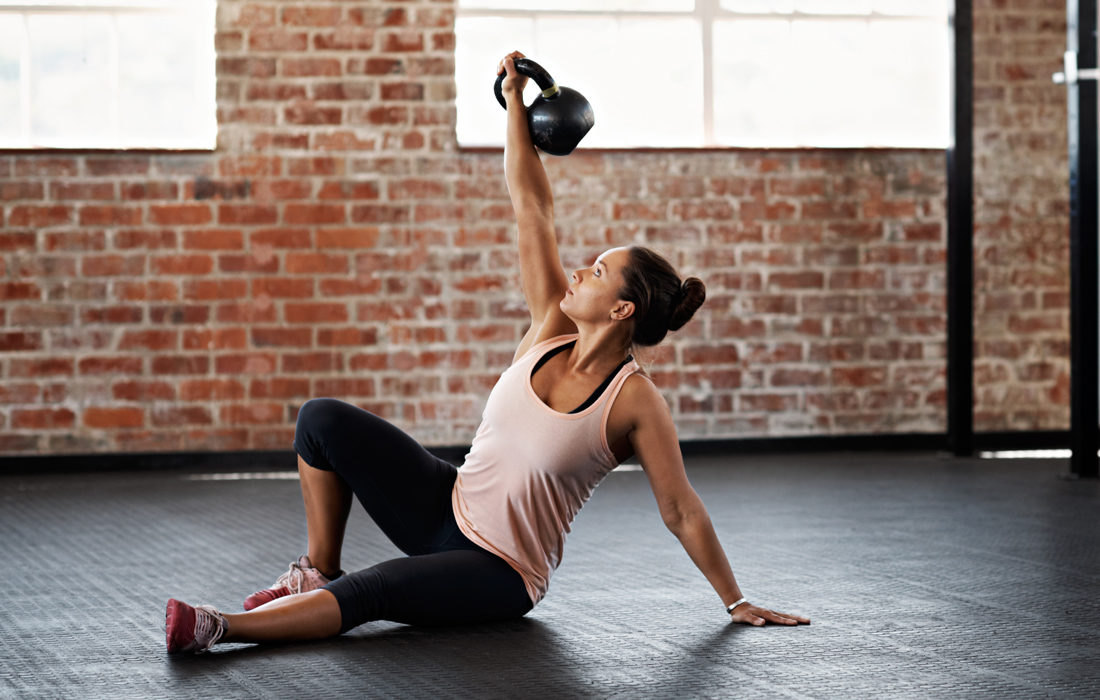
The Turkish Get-Up is an exercise that dates back to ancient wrestlers in what is now Turkey to prepare themselves for competitions. This is a great ancient exercise with present day benefits. The Turkish Get-Up is a total body exercise that increases strength, stability, mobility, balance and coordination. It can be used in a warm-up, as an assessment of overall strength and mobility, and within a strength-training program. The Get-Up is generally performed with a kettlebell, but can also be used with a dumbbell. The Get-Up is a complex movement that requires coordination in order to execute properly, but the benefits of this exercise are well worth it.

Here are a few benefits of the Turkish Get-Up

  • Single leg hip stability during the initial roll to press and during the bridge
  • Shoulder stability
  • Incorporates all three planes of movement
  • Thoracic extension and rotation
  • Hip and leg mobility and active flexibility
  • Stability in two different leg patterns – lunge stance as well as squat stance
  • Both rotary and linear stability
  • Ankle mobility
  • The ability to link movement created in our extremities to the rest of our body

Step-by-step guide on how to properly execute the Turkish Get-Up

  1. Starting position – Lie on your back with kettlebell or dumbbell in your right hand – straight up in the air. Right knee will be bent with foot planted firmly on the ground and the left leg is straight on the ground. Left arm is straight on the ground, at a 45 degree angle.
  2. Elbow – With your right foot being firmly on the ground, roll onto your left elbow, with weight still above head.
  3. Hand – Once you have shifted weight to the elbow, continue rolling up until your weight is supported in your left hand. You should have 3 support points – left hand, left glute, and right foot.
  4. Bridge – Lift your hips off the ground keeping your right arm extended straight overhead, and your weight in your left hand. Keep looking up at the weight and keep it overhead.  You should have 2 support points – left hand and right foot.
  5. Leg Swing – With hips still lifted in the bridge, swing your left leg under your body, and place your knee on the ground underneath you.
  6. Kneel – Take your left hand off of the floor and straighten up so your body is upright. Turn your legs so that they are parallel to each other.
  7. Stand up – Drive your back foot through your hips and into your front foot, stand up from the lunge – keeping the weight straight overhead and look at the weight.
  8. Reverse Lunge – Keep the weight overhead, and step your left foot back in a reverse lunge, lowering your knee to the ground – with legs parallel.
  9. Lowering Hand – Swinging hips, lower left hand down to the ground.
  10. Swing leg – Now that your hand is on the ground, swing your left leg back to the front of you – with your weight in your left heel, left hand, and right foot.
  11. Elbow – Lower your weight back to your elbow – with contact points being your left elbow, left butt cheek and right foot.
  12. Finish – Lower your torso down to the ground and end in the beginning position.

The Turkish Get-Up can be modified for beginners and people dealing with injuries. Possible modifications would be to lighten the weight, no weight, Stage 1 Get-Up, or Stage 2 Get-Up.

Stage 1 Get-Up


Stage 2 Get-Up


How to Navigate the Holiday Seasons While Staying Healthy

How to Navigate the Holiday Seasons While Staying Healthy

Successfully getting through the holidays requires more than just knowing what healthy food looks like, it is the mindfulness and establishing a behavior change when at social events and food gatherings. Slow down with eating, savor your food, enjoy the moment of the holiday events and not just focusing on the food.

  • Breathe between bites of food
  • Pay attention to physical hunger cues vs emotional eating or mindless eating
  • Set your fork down in between eating
  • Use a smaller appetizer plate, you can always grab seconds but don’t to overload a large dinner plate
  • Bake holiday treats year round not “last chance eating” and overeating a “one time food”
  • Eat what you love, leave what you like
  • Alternate your bubbly cocktails w/ sparkling water
  • Be a snack smuggler – keep appetite in check and nourish your body rather than letting blood sugar drop and grabbing fast food

Social Gatherings

Holidays are much more than 100% food. Consider all the other aspects that make the holidays special and unique and go into the various events emphasizing those factors and not just thinking about food and what you will eat. Challenge yourself to do two non food related tasks before starting in on food.

  • Go to social gatherings to gather, not to eat
  • Keep plate at table and socialize without a plate in your hand (prevents mindless eating)
  • Hang out with family and friends in a living room or alternative space instead of chatting around food
  • Eat mindfully = three bites and goodnight
  • Give yourself permission to enjoy your indulgences guilt free

10 Healthy Cooking Alternatives

    1. Gravy — Refrigerate the gravy to harden fat. Skim the fat off. This will save a whopping 56 g of fat per cup.
    2. Mashed potatoes – swap out for cauliflower
    3. Stuffing — Use less bread and add more onions, garlic, celery, and vegetables. Add fruits such as cranberries, apples or pears.
    4. Sweet potatoes – add in other vegetables for more color & nutrients such as butternut squash, beets, brussel sprouts
    5. Green bean casserole – use a skim milk with Greek yogurt for a creamy, but lower calorie alternative
    6. Turkey – Enjoy delicious, roasted turkey breast without the skin and save 11 g of saturated fat per 3 oz serving
    7. Ham – opt for nitrite free ham and keep your portion in check to reduce excess sodium
    8. Pumpkin pie – substitute with plain Greek yogurt and flaxseed = increased protein and 100 calories less per slice
    9. Cherry pie – use fresh fruit instead of “pie filling” and for the crust – whole wheat flour + ground flaxseed
    10. Cookies – use unsweetened applesauce instead of oil

GARLIC MASHED CAULIFLOWER

Ingredients

  • 1 cauliflower whole head, separated into florets
  • 1 garlic whole bulb
  • 1 teaspoon olive oil
  • 2 teaspoons thyme fresh chopped
  • 1/4-1/2 teaspoon kosher salt or to taste
  • 1/4 teaspoon black pepper freshly ground

Instructions

  1. Preheat oven to 400 degrees.
  2. Slice about 1/4″ from the head of garlic and drizzle olive oil over the exposed cloves. Wrap garlic in aluminum foil and roast for 40-50 minutes, until soft. Remove from oven and cool until you can handle it.
  3. Meanwhile, set a vegetable steamer into a pot or saucepan with a lid. Add an inch of water to the pot and fill the steamer basket with the cauliflower florets. Cover the pot and bring the water to a boil. Cook cauliflower until very tender (so that when you pierce it with a knife it goes in and comes out easily without catching), about 10 minutes.
  4. Transfer cauliflower to a food processor. Squeeze the individual cloves of roasted garlic into the cauliflower. Add the thyme and secure the lid on the food processor. Pulse the cauliflower mixture until there are no lumps and it’s smooth like mashed potatoes. This may take a few minutes.
  5. Season with salt and pepper to taste. Serve.

APPLE AND SQUASH STUFFING

Ingredients

  • 4 cups butternut squash, peeled and cubed
  • 2 onions, chopped
  • 2 stalks celery, diced
  • 2 cups Gala apples, peeled and diced
  • 1 clove garlic, chopped
  • 1/3 cup olive oil
  • Optional – 4 slices pancetta, about 1/4-inch (1/2-cm) thick, diced
  • 1 lb ground turkey
  • 2 teaspoons Dijon mustard
  • 8 cups cubed stale bread loaf without the crust
  • 3 cups chicken or beef broth
  • 2 eggs, lightly beaten
  • 1 cup walnuts, toasted and chopped
  • Salt and pepper

Instructions

Butter a large 33 x 23-cm (13 x 9-inch) baking dish or with a capacity of at least 12 cups.

In a large and deep non-stick skillet or a large saucepan, sauté the squash, onions, celery, apples, and garlic in half the oil for about 10 minutes. Season with salt and pepper. Transfer to a large bowl.

In the same skillet, brown the ground meat (and pancetta if using) in the remaining oil. Add the mustard. Season with salt and pepper. Spoon over the vegetables and add the remaining ingredients. Stir to combine and spoon into the baking dish. Bake the stuffing in the oven during the last 30 minutes of cooking the turkey, on the bottom rack. While the turkey is resting, increase the oven’s temperature to 350 °F and bake the stuffing for another 30 minutes or until it is firm and golden brown.

GREEN BEAN CASSEROLE

Ingredients:

  • 2 pounds fresh green beans, trimmed and cut into bite-sized pieces
  • mushroom sauce (see below)
  • crispy onion topping (see below)

CRISPY ONION TOPPING INGREDIENTS:

  • 1 Tablespoon olive oil or butter, divided
  • 1 medium onion, peeled, quartered and thinly sliced
  • 1/2 cup Panko breadcrumbs
  • 1/4 cup freshly-grated Parmesan cheese
  • 1/4 teaspoon salt

MUSHROOM SAUCE INGREDIENTS:

  • 2 Tablespoons butter or olive oil
  • 8 ounces white button or baby bella mushrooms, thinly sliced
  • 4 cloves garlic, minced
  • 3 Tablespoons all-purpose flour (or cornstarch, if gluten-free)
  • 1/2 cup chicken or vegetable stock
  • 1 cup milk
  • 1/2 cup Parmesan cheese, grated (not packed)
  • 1/2 teaspoon salt
  • 1/4 teaspoon ground black pepper

Instructions:

TO MAKE THE CASSEROLE:

Begin by preparing the onion topping.  Then make the mushroom sauce.

While those are cooking, preheat oven to 375 degrees and bring a large stockpot of water to a boil.  Add the green beans and boil for 3-5 minutes, or until they reach your desired level of doneness.  (I like mine cooked but still slightly crispy.)  Drain the green beans, then transfer them to the bowl of ice water and stir them in.  This will stop them from cooking more.

When the mushroom sauce is ready, transfer the green beans into the pan with the sauce and toss until combined.  Pour the green bean mixture into a baking dish that has been greased with cooking spray.  Then sprinkle the onion topping evenly on top.  Bake for 25 minutes.  Serve warm.

TO MAKE THE CRISPY ONION TOPPING:

Heat half of the butter in a large saute pan over medium-high heat until melted.  (Or if using olive oil, heat until it is shimmering.)  Add the onions and saute, stirring occasionally, for about 5 minutes or until they are soft and starting to brown around the edges.  Use a slotted spoon to transfer the onions to a separate mixing bowl.

Add the remaining half tablespoon of butter (or oil) to the pan and heat until melted.  Add in the Panko breadcrumbs and stir until combined.  Cook, stirring once every 30 seconds or so, for about 3-5 minutes until the Panko is toasted and lightly golden.  Remove from heat and transfer the Panko to the bowl with the onions.  Stir in the Parmesan and salt, and toss the mixture until combined.  Set aside.

TO MAKE THE MUSHROOM SAUCE:

In the same saute pan that you used to cook the onion and Panko, heat butter in a large saute pan over medium-high heat until melted.  (Or if using olive oil, heat until it is shimmering.)  Add mushrooms and saute for 3-5 minutes until they are soft and cooked, stirring occasionally.  Add the garlic and saute for an additional 1-2 minutes until fragrant, stirring occasionally.  Sprinkle with flour, and stir to combine. Saute for an additional minute to cook the flour, stirring occasionally.

Slowly add chicken broth, whisking to combine until smooth. Whisk in milk, and bring the mixture to a simmer. Let cook for an additional minute until thickened, then stir in Parmesan cheese, salt and pepper until the cheese is melted. Reduce heat to low until the sauce is ready to be tossed with the green beans.

(*If the sauce seems too thick, you can add in an extra 1/2 cup of milk.  If the sauce is too thin, you can add in an extra 1/4 cup of Parmesan cheese.)


HEALTHIER PUMPKIN PIE

Ingredients

  • 1 can (15oz) pumpkin puree
  • 1 (13.5oz) can full-fat coconut milk
  • 1/4 cup rolled oats
  • 2 tbsp ground flax
  • 1/3 cup coconut sugar or brown sugar
  • pinch pure stevia, or 2 tbsp extra brown sugar
  • 2 tsp cinnamon
  • 1 tsp pumpkin pie spice
  • 1/2 tsp salt
  • 1 tbsp pure vanilla extract

Instructions

Preheat oven to 400°F. Blend all ingredients together until smooth, then pour into a prepared pie crust (such as the recipe below) in a 10-inch round pan. Bake 27 minutes (it will still be underdone after this time, which is okay!), let it cool, then refrigerate at least 5 hours uncovered for the pie to thicken and “set.” Note: Feel free to experiment with other milks, I can’t vouch for the results but that is an option.

Crust Recipe:

1 1/2 cups whole wheat pastry flour or all-purpose flour
1 tsp salt
1/3 cup xylitol or sugar of choice
1/2 cup avocado oil or coconut oil
2-4 tbsp water

Preheat oven to 200°F. In a large mixing bowl, combine all dry ingredients. Add oil and stir. Add water as needed until it just sticks together but is not gummy. Press evenly into a 10-inch pie pan. Put the crust in the oven and immediately increase the temperature to 350°F. (The crust will rise, so either use pie weights during baking or just press the pie crust back down afterwards.) Bake 15 minutes. Let cool.

GINGERBREAD COOKIES

Ingredients:

  • 1 cup + 6 tbsp white whole wheat flour
  • ¾ tsp cornstarch
  • ¼ tsp baking powder
  • 1 ½ tsp ground ginger
  • ¼ tsp ground cinnamon
  • ⅛ tsp ground nutmeg
  • ⅛ tsp ground cloves
  • ¼ tsp salt
  • 2 tbsp (28g) unsalted butter or coconut oil, melted and cooled slightly
  • 1 large egg, room temperature
  • 1 ½ tsp vanilla extract
  • ¼ cup molasses
  • 1 tsp vanilla crème stevia

Instructions

  • To prepare the cookies, whisk together the flour, cornstarch, baking powder, ginger, cinnamon, nutmeg, cloves, and salt in a medium bowl. In a separate bowl, whisk together the butter, egg, and vanilla extract. Stir in the molasses and vanilla crème stevia. Add in the flour mixture, stirring just until incorporated. Transfer the dough to the center of a large sheet of plastic wrap, and shape into a 1”-tall rectangle. Cover the top with another large sheet of plastic wrap. Chill the dough for at least 1 hour.
  • Preheat the oven to 325°F, and line two baking sheets with silicone baking mats or parchment paper.
  • Leaving the cookie dough between the sheets of plastic wrap, roll it out until ⅛” thick. Lightly flour your cookie cutter, and press it into the dough, making sure each shape lies as close to its neighbors as possible to minimize unused dough. Peel the unused dough away from the shapes, and place them onto the prepared baking sheets. Re-roll the unused dough, and repeat.
  • Bake the cut out cookie dough at 325°F for 8-10 minutes. Cool on the baking sheet for 5 minutes before turning out onto a wire rack to cool completely.

SUGAR COOKIES (Grain-free, gluten free and refined sugar free!)

Ingredients

Wet

  • 1 large egg
  • 1 teaspoon almond extract
  • 1/4 cup honey
  • 2 tablespoons coconut oil, melted
  • optional: food coloring

Dry

  • 2 cups blanched almond flour
  • 1/2 cup coconut flour
  • 1/2 teaspoon baking soda
  • pinch salt

For the Icing

  • 2 cups organic powdered sugar
  • 2-3 tablespoons water
  • 2-3 drops pink/red food coloring

Toppings

  • Sprinkles
  • Edible Glitter

Instructions

  1. Preheat oven to 350ºF and line 2 baking sheets with parchment paper. Set aside.
  2. In a medium-size bowl, whisk together dry ingredients and set aside.
  3. In a large bowl, whisk together egg, almond extract, and honey. Then, add in melted coconut oil and whisk again.
  4. Slowly add dry ingredients to wet until your dough is formed. Use a wooden spoon at first and then switch to using your hands. The dough may seem crumbly at first, but continue to knead dough together until it forms a ball.
  5. At this point, you can add your food coloring. We suggest starting off with just a few drops and kneading the food coloring into the dough. You can also make multiple colors of dough by separating in half or thirds.
  6. Create a ball with your dough and wrap with plastic wrap and place in refrigerator for 30 minutes.
  7. Once the dough has cooled. Remove from fridge and sprinkle coconut flour onto a hard, cool surface as well as your rolling pin. Then, use rolling pin to roll out the dough so that it’s around 1/4 to 1/2 of an inch thick. If it’s sticking, sprinkle on some more coconut flour.
  8. Use small/medium cookie cutters to create sugar cookie cut outs. Place shapes onto your parchment-lined baking sheet. Don’t worry about spacing too much, the cookies will not expand that much.
  9. Bake at 350ºF for 6-8 minutes or until cookies begin to brown. They cook fast, so be careful!
  10. Immediately remove from hot pan and place on cookie rack. Let cool for at least 30 minutes before frosting.
  11. For the icing: add water to powdered sugar one tablespoon at a time and mix. Add enough water, until you’ve reached your desired thickness. If you want to color your frosting, add a few drops of whatever color you desire. Then, transfer into a piping bag (or plastic bag) and frost away!
  12. Frost cookies with icing and then decorate with sprinkles and edible glitter.

INTERESTED IN MORE HEALTHY TWISTS ON CHRISTMAS COOKIES?

Check out: https://www.wellandgood.com/good-food/healthy-christmas-cookie-recipes/


5 Healthy Holiday Eating Tips

5 Healthy Holiday Eating Tips

Holiday Food Eating Facts

  • It is easy for holiday eating to turn into holiday OVER-eating.
  • We gain 1-2 pounds during this time and don’t lose it come January.
  • Research also shows those who are already overweight gain an average of 5 holiday pounds that don’t come back off and add up year after year.

Tip #1: Don’t Skip Meals

  • Don’t attempt to restrict intake leading up to the holidays…this will only make you more likely to overeat once the holiday meals come.
  • Practice well-balanced and healthful eating leading up to the holidays, including adequate fruits, vegetable, lean proteins, high fiber foods and whole grains.

Tip #2: Avoid Overeating…Moderation is key!

  • Enjoy, Stop, Think
  • Smaller plate, smaller portions
  • Drink water throughout the day, dehydration can be mistaken for hunger
  • It IS possible to have too much of a good thing
  • Balance portions on your plate
  • Moderation applies with dessert too – One whole piece of your favorite  dessert, or two half-sized pieces if you can’t decide

Tip #3: Veggies First

  • First fill your plate with vegetable and salad options before adding the entrees and desserts to the plate.
  • ↑ vegetables + ↓ entrees & desserts = ↓ calories, ↑ fullness, satisfaction, nutrients

Tip #4: Play Your Part

  • Bringing a dish? Make it a healthy option!
  • Sides: Fruit or vegetable tray, salad, roasted vegetables
  • Entrée: Lean meat, whole grain pasta, beans

Tip #5: Stay Active


Which is Better, Back Squat or Front Squat?

Which is Better, Back Squat or Front Squat?

Why Squatting is Important

The squat is a vital, natural, and functional component of your being. In the bottom position, the squat is nature’s intended sitting posture. Only in the industrialized world do we find the need for chairs, couches, benches, and stools. This comes at a loss of functionality that contributes immensely to decrepitude. “If you don’t use it, you lose it.” We see this far too often in today’s modern society. This non-usage of our bodies through all ranges of motion cause weak glutes and hamstrings which, in turn, causes improper squat form through poor engagement, weak control, or lack of awareness in the glutes and hamstrings.

Which is Better, Front Squat or Back Squat?

Most importantly, an athlete’s mobility should determine which lift is better suited to him or her. If you can safely perform one lift and not the other, the choice is apparent. The proper mobility at the shoulder, upper and lower back, hips, knees and ankles plays a huge part in the optimal squat type for an individual as they slightly differ from one another.

Front Squats require significantly more mobility than Back Squats. You need excellent thoracic spine mobility to keep your chest up, outstanding wrist flexibility and shoulder mobility to rack the bar, superb hip and groin mobility to squat low with your knees in line with your toes, and great range of motion (ROM) through the ankles to keep your lower back from rounding. One pro to front squats is the ability to protect the shoulders more by using the clean grip or cross arm grip. I would recommend the front squat to individuals that are trying to increase their olympic lifts, such as cleans and snatches, as the grip carries over to the receiving phase in these movements.

Back squats focus more on the hips, glutes, and lower back, which is great training for movements that require hip extension. Another favorable aspect of back squats is the ability to add more load (weight) to the movement, which in turn adds to more overall strength throughout the body, specifically in the core.

Win-Win Collaboration

Back squats and front squats differ in their positioning and targeted muscles; however, there are benefits to both variations. When used in conjunction with one another, these two exercises can reap huge benefits for the athlete and elevate performance. Unless you are an overhead athlete or have lower-body injury/mobility issues, front squats and back squats are imperative to your lifting program, especially if you are training your lower body twice a week.

By: Tandy Juell

Performance Coach


Enhance Your Mobility With This 5 Minute Routine

Mobility Series

Flexibility

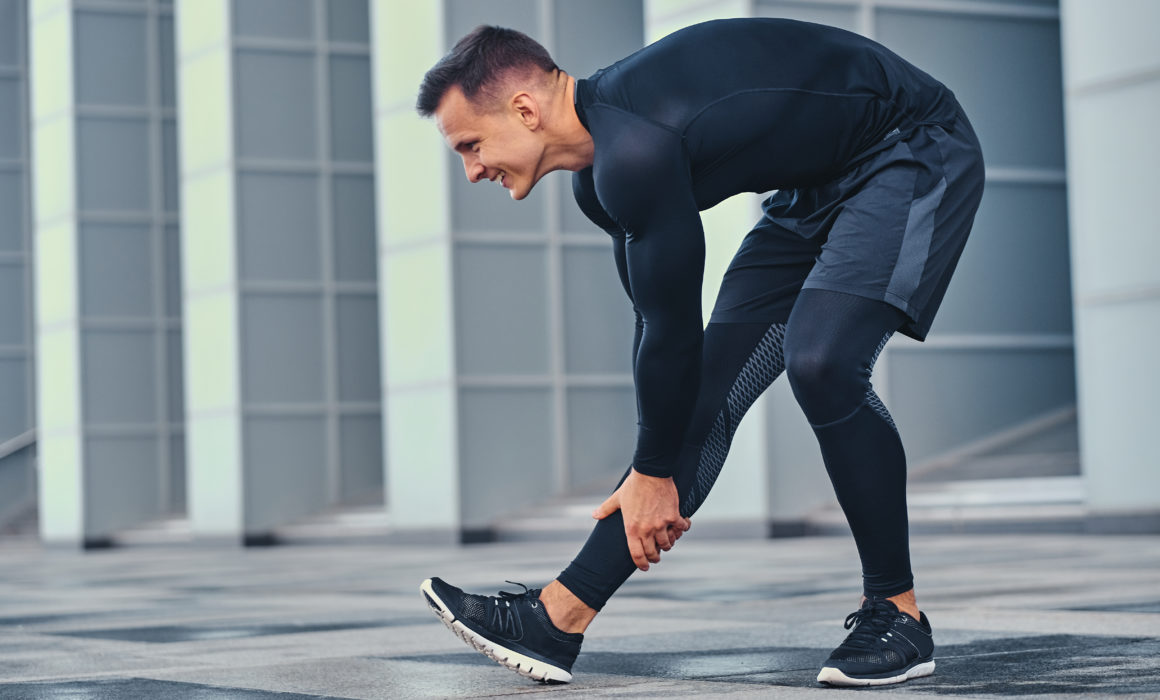
Flexibility is the absolute range of motion in a joint or system of joints, and the length of muscle that crosses the joint involved. It directly correlates with range of motion and mobility.  Range of motion is the distance and direction the joint can move, while mobility is the ability to move without restriction.

Mobility

Even though mobility and flexibility sound similar they are slightly different. Mobility within a joint is the degree to which the area where two bones meet (known as an articulation) is allowed to move without being restricted by the surrounding tissue such as tendons, muscle, and ligaments. Think of mobility as the range of motion around the joint.

A good level of mobility allows a person to perform movements without restriction, while a person with good flexibility may not have the strength, coordination, or balance to execute the same movement. Good mobility does not always mean good flexibility.

Benefits of Increasing Your Mobility

  • Increased range of motion for increased strength potential.
  • More muscle activation.
  • Decreased risk of injury.
  • Decreased soreness and joint pain.
  • More fluid movements.

Try This Mobility Routine Performing Each Exercise for 30 Seconds

Foam Roll: Back

Foam Roll: Back Side to Side

Foam Roll: Glute

Foam Roll: Hamstring

Foam Roll: IT Band

Foam Roll: Quad

Foam Roll: Adductors

T-Spine Lunge

Leg Swings

Lying Knee Hugs

Side Lying T-Spine Rotation


10 Minute Bodyweight Core Circuit

10 Minute Bodyweight Core Circuit

A strong core enhances balance, stability, and energy transfer. Thus, it can help prevent injuries during day-to-day activities and sports injuries. Core strength directly correlates to exercise and sport activities like walking, jogging, sprinting, throwing, squatting, jumping, and swinging motions. The stronger your core is, the more efficient you will be at these activities. Through strengthening your core, you will see an increase in your fitness, performance, as well as minimize your risk for injuries.

When doing a core routine you want to incorporate exercises that target all of the muscles in your core musculature (see table below).

Core Muscle Groups

Pelvic floor muscles

Tansversus abdominis

Multifidus

Internal and external obliques

Rectus abdominis

Erector spinae (sacrospinalis)

Erector spinae (sacrospinalis)

Longissimus thoracis

Diaphragm

Latissimus dorsi

Gluteus maximus

Trapezius

Gluteus medius

Psoas major

Serratus anterior

Try this 10 minute bodyweight core circuit at home or at the gym

Perform 1 round of each exercise for 1 minute before moving onto the next. Take minimal rest between exercises. Complete

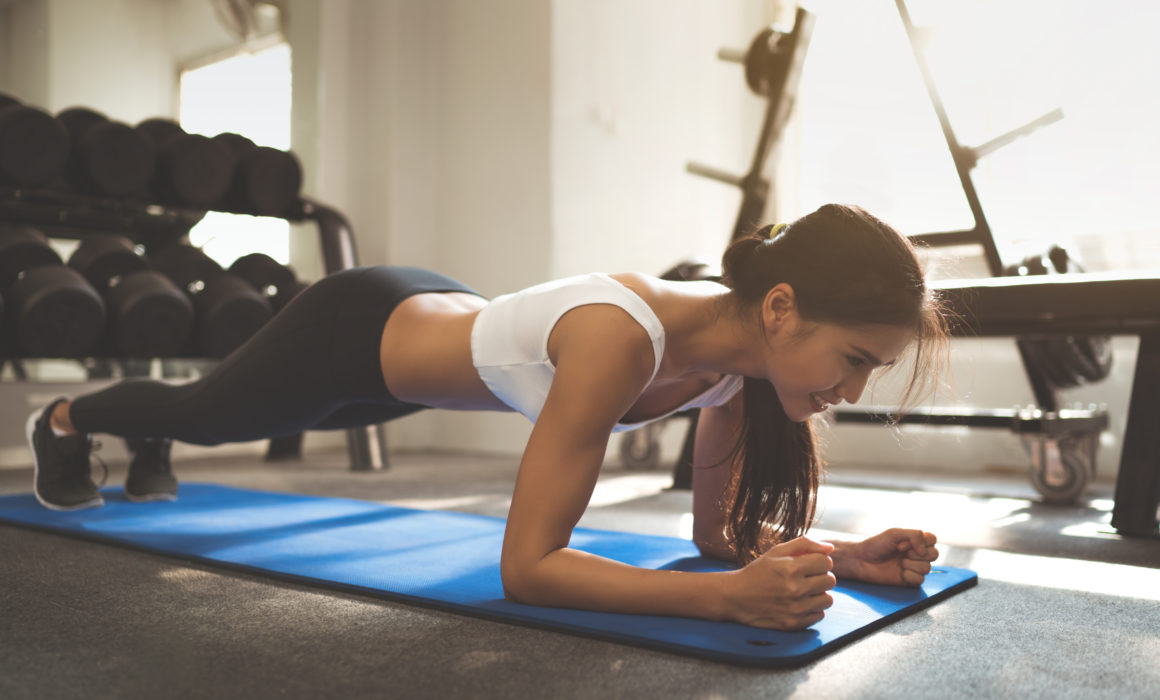
Plank  – 1 minute

Side Plank – 30 seconds each side

Dead Bug – 1 minute

Glute Bridge– 1 minute

Bird Dog– 1 minute

Half Kneeling Wood Chop – 30 seconds each side

Alternating Leg Lowers – 1 minute

Penguin – 1 minute

Russian Twist– 1 minute

Clams – 30 seconds each side


Advance Your Core Training with The Sling System

Advance Your Core Training
with The Sling System

The core is the foundation of your body. It links everything together and provides stability for athletic skills. So simply doing a few Sit-Ups or even Planks won’t cut it when developing an athletic core. The key is developing what is called the sling system. The sling is a group of contralateral (opposite) muscle groups that work in a diagonal fashion and that lie on the anterior (front) and posterior (back) portion of the trunk. The sling can be broken down into the posterior and anterior oblique slings. The primary function of the sling is to stabilize the pelvis and spine during movement, which enhances performance in all sports from track and field, football, baseball, golf and volleyball.

Anterior Oblique System

The anterior oblique sling system includes the external and internal oblique, opposing leg adductors complex, and hip external rotators. The oblique plays a key role in mobilizing and stabilizing gait. It functions by pulling the leg through during the swing phase. Athletic movements involve many moving parts. The anterior sling system helps stabilize the pelvis and spine during acceleration, deceleration and multi-directional movements. The anterior oblique system contributes to rotational forces and hip flexion and stabilizes the lumbo-pelvic-hip complex.

Here’s how to train it:

Posterior Oblique System

This system includes the gluteus maximus, latissimus dorsi and thoracolumbar fascia. The glute max and lat attach to the thoracolumbar fascia, which connects to the sacrum. Their fibers run perpendicular to the hip joint so when the opposite glute max and lat contract, the tension built up stabilizes that hip joint, enhancing energy transfer.

The posterior oblique subsystem contributes to propulsion when we walk, run or sprint. It is also a key contributor to rotational forces such as swinging a golf club or baseball bat, or throwing a ball. If there is any dysfunction in the posterior oblique subsystem, the hip joint will become unstable, leading to back pain. Someone with weak glutes and/or lats will most likely have a motor unit recruitment dysfunction leading to increased tension in the hamstrings and will be at a higher risk of recurring hamstring strains.

Here’s how to train it:

Take your core training to the next level by incorporating these exercises to optimize performance!


Decrease Injury with Deceleration Training

Decrease Injury with Deceleration Training

Sports are becoming increasingly competitive. In order to even be considered as a potential starter, athletes have to prove themselves. Coaches look for not only the most skilled athletes but also the most athletic. Parents and athletes are more aware of the importance of strength and conditioning training than ever before. As a result, most young athletes are falling into three categories:

  1. Athletes that have not been exposed to structured strength training techniques or speed and agility protocol. This group is at risk of overuse and soft tissue injuries because their joints and ligaments are not resilient and are susceptible to strains, tears, and stress fractures.
  2. Athletes that have been exposed to strength and conditioning along with speed and agility training, but have not been taught by a professional. Learning improper movement patterns and stressing them with high loads is a dangerous combination and will lead to injury.
  3. Athletes that have been exposed to a progressive periodized strength program that is appropriate for their age and experience. This group will have a solid foundation of strength, coordination, speed, agility, and power. They will have the advantage of performance benefits and less injury risk.

If we break down sports or athletics into its simplest form, it is a series of complex movements through multiple planes. Some are predictable and some are unpredictable. In order to prepare for sports, athletes must be able to tolerate the forces produced in their sport. If the forces required in the sport exceed the athlete’s ability to produce or absorb that amount of force, they are at greater risk for injury. It is estimated that there are around 80,000 ACL injuries each year. Let’s look into why these injuries may be occurring.

In the sports performance industry athletes are attracted to buzz words like speed, explosiveness, power, and vertical jump. All of these terms focus on acceleration movements or concentric muscle contractions. Putting a disproportionate focus on power and explosiveness will lead to a deficit in the ability to properly control the body when decelerating. Training specifically in the acceleration phase will primarily use concentric movements. In the leg we find that the quadriceps will become over-dominant and create an excessive amount of stress on the ACL. Therefore, it is important that athletes train athletes to use the hamstrings and glutes when decelerating, should be in our top priorities.

A lot of trainers and coaches don’t teach proper deceleration or landing mechanics. They may assume athletes know how to slow down, stop, and land. Now, they may be right in that most athletes can execute that task. However, the better question is can they slow down, stop, or land “properly”? Research supports that there are IDEAL positions and angles that athletes can put themselves in that will allow them to significantly decrease risk for injury simply by being in the right position while cutting, sprinting, or landing from a jump.

In order for athletes to prepare for the demands of their sport, it is important to incorporate these three elements into training:

  1. Emphasize the end of the drill – When performing agility or sprint drills, athletes should intently come to a complete stop abruptly when ending the drill instead of jogging or coasting. To decelerate, lower the hips and slightly over reach by contacting the ground in front of the hips. This will help enhance breaking ability over time.
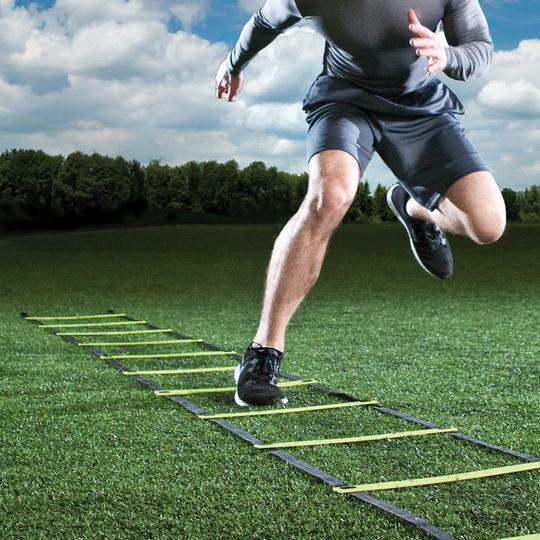
  2. Focus on force reduction deceleration technique – Start deceleration drills off with an agility ladder and only perform the drills at 70%.  Really focus on digging the foot into the ground, coming to a complete stop, and maintaining low hips and proper body angle. Progress by increasing speed and more complex agility/plyometric drills.
  3. Add tempo into strength training – Emphasize the eccentric phase or the muscle lengthening phase of the lift. For example, instead of doing regular squats, descend down into the squat slowly for 3-10 seconds to work on controlling the load. Isometrics are also a great way to improve deceleration ability. Let’s use the same squat as an example. Descend down into the bottom of the squat and pause for 2-10 seconds before exploding upwards.

Linear Deceleration Technique

  • Hips down – 45 degree angle
  • Knees bent – Avoid <20 degrees of knee bend
  • Lean back – Contact should be nearly 45 degrees. Opposite of power line
  • Heel contact – Contact should begin with heel, roll to ball of foot, and press firmly into ground
  • Multiple steps – Spreading the force out of multiple steps greatly reduces chance of injury

Deceleration Drills

Linear Cone Drill

  • Set up cones 3 yards apart, sprint to the cones, decelerate into a lunge, backpedal to cones. Continue for designated sets/reps.

Lateral Hurdle Run w/ Pause

  • Set up 3-5 hurdles, laterally run over the hurdles, focus on a deep pause for about 2 seconds when changing direction.

Ickey Shuffle

  • Set up a ladder, run diagonally across the ladder, 2 feet in, 1 foot out. Focus on proper hip/knee angles on outside of ladder.

Depth Drop

  • Drop from a depth of 6”-18”, land simultaneously with both feet, very little/no hip drop, hips back, knees bent. Pause for 2 seconds.

15 Minute High Intensity Lunch Break Circuit

15 Minute High Intensity Lunch Break Circuit

Do you ever feel overwhelmed with too much on your plate? Bombarded with day-to-day tasks at work and at home? We can never seem to fit in everything that needs to get done within 24 hours. For a lot of us, time is enemy number one of our fitness goals. There is a pre-conceived notion that a workout that lasts less than 60 minutes is subpar. This idea has been planted in our brains, and we don’t feel satisfied or accomplished unless we get exactly an X amount of cardio and a Y amount of strength training. Well, for those of you who don’t have the option of dedicating hours at the gym, you can breathe a sigh of relief. Studies show that a quick 10-15 minute workout will earn you great benefits rather than not exercising at all. Take a look at what a short, lunch break circuit can do for you:

According to the Center for Disease Control and Prevention, you can get the same benefits from 2-3 short workouts during the day as you can from a long trip to the gym. Shorter workouts tend to be higher in intensity. This provides greater reward than a moderate intensity, long workout. Studies have shown that HIIT (high intensity-interval training) for 20-30 minutes can produce increased fat loss and muscle development. If you’re stressed with work or your school workload has you feeling down, remember that a mini workout gets your blood flowing to the brain which brings so many benefits (including the motivation to get your work done!).

  • Gain energy
  • Improved mood and reduced stress
  • Headache prevention/relief
  • Better sleeping habits
  • Decrease in depressive feelings
  • Lowered blood pressure
  • So much more!

Consistent, shorter, high intensity workouts have shown to produce great improvements to your cardiovascular health. A study published in the Journal of Strength and Conditioning, states that HIIT types of workouts allow your heart to grow bigger and stronger, which increases your overall fitness capabilities. Your heart learns to perform at a higher capacity and recover quickly. Who doesn’t want a stronger heart?! We all know that it is way easier to find 15-30 minutes in our day, rather than set aside 1-2 hours. Regularly finding those short intervals during the day to complete a mini workout can do wonders for your motivation and consistency. One healthy choice leads to another, so when those healthy choices are painless to make and easy to find, we are motivated to stay on the right track.

Some of you may be wondering, “What in the world can I do on my lunch break or free time in only 15 minutes?” Working out doesn’t have to require dumbbells or machines–your bodyweight will do just fine. Check out the workout below, designed by one of our trainers, to get you started. Feel free to mix it up, which is easy to do during an HIIT exercise, and be creative! Remember this the next time you find yourself struggling or looking for motivation–something is always better than nothing.

15 Minute Lunch Break Circuit

Warm Up

Jump Rope-2 min

*Perform these 3 exercises for 30 seconds each, 2 sets

Body Weight Squats

Push Ups

Sit Ups

*Perform these 3 exercises for 30 seconds each, 2 sets

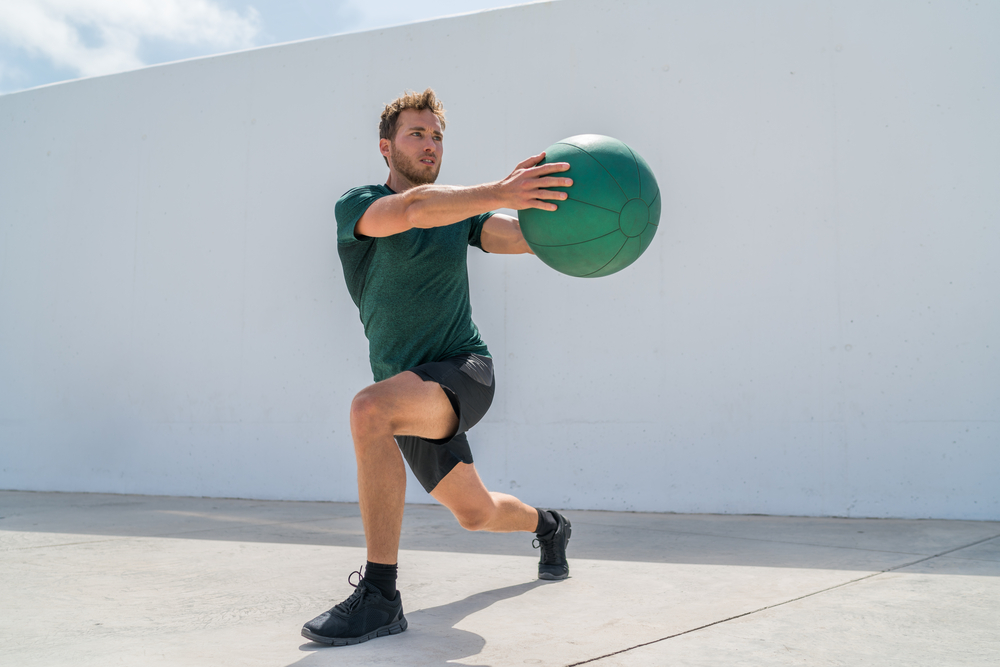
Dumbbell Alternating Lunge

Plank Ups

Russian Twist

*Perform these 3 exercises for 30 seconds each, 2 sets

Alternating Lateral Lunges

T-Spine Push Up

Penguin

Burpees       (As many as you can in 1 minute)

Always remember to stretch while you cool down, keep those muscles loose and improve your flexibility!

If you enjoyed this workout and you would like to receive personalized workouts on the go right on your smart phone, message us by clicking here to start your 7 day FREE trial of our online personal training program! Risk free, easy to use, and convenient.


Increase Your Speed with Plyometric Training

Increase Your Speed
with Plyometric Training

When you hear the term “plyometric,” most people think of jumping or jump training. However, plyometric is defined as an action that causes a muscle to reach maximal force in the shortest time possible. We can take the term “plyometric” and directly apply it to speed training. Before we do, let’s review how the stretch-shortening cycle (SSC) contributes to increasing your speed with plyometric training by breaking down the three types of muscle contractions.

  1. Eccentric Phase – This is the lowering phase where the muscle lengthens.
  2. Isometric Phase – The static muscle contraction that acts as the bridge between the eccentric and concentric phase.
  3. Concentric Phase– This is the phase when the muscle contracts and shortens to move the external load.

Anytime you perform dynamic movement you are utilizing the SSC. For example, let’s take a typical squat. When descending downward, your hips move back. Your knees bend. The quads, hamstrings, and glutes lengthen. This is the eccentric phase of the squat. At the end of the eccentric phase, right before you transition upward, there is a slight pause at the bottom of the squat. This is the isometric phase. As you transition upward, your quads, hamstrings, and glute muscles shorten. This causes your knees and hips to extend, completing the concentric phase.

Now that we have gone over the SSC, let’s dive into the relationship between plyometrics and the SSC. We know that plyometric is a rapid, maximal force movement.  The stretch-shortening cycle is a 3-phase muscle contraction involved in dynamic movements. Now how do they relate to one another? Plyometric training helps enhance the SSC by rapidly going through the eccentric, isometric, and concentric phases. This trains dynamic movements like sprinting and jumping to be more efficient and explosive.

So, how can you increase your speed with plyometric training? If we separate the three phases of the SSC and train them individually, you will see an overall increase in speed. We train the eccentric part of a movement to be able to absorb more energy and power. We then train the isometric phase, so that the force we generated and absorbed in our eccentric phase is not lost in transition from eccentric to concentric and actually adds to the force production. Finally, we focus on the concentric phase, ensuring that we get the highest rate of force development out of the movement.

  1. Eccentric – Train slow and focus on your landing! Allow your muscles to recruit the necessary energy in the weight-room and spend 3-8 seconds on the way down in each exercise. When jumping, focus on the initial contact to the ground–don’t waste the energy produced. Avoid knees going in or out, hips swaying, or chest falling forward.
  2. Isometric – Train at a stop, hold the landing! Allow your muscles to maintain the energy that has been produced. Get to the bottom of your exercise and hold it for 3-8 seconds. When jumping, land properly, then hold that landing position for 2 full seconds before standing up.
  3. Concentric – Train fast and focus on exploding! Allow your muscles to use the energy produced, come out of the bottom of the exercise quickly, but don’t sacrifice form!

(Pro tip: Decrease the amount of weight when doing concentric training until you can adequately control that weight.)

When jumping, focus on the up portion being as explosive as you can make it. Throw your chest to the sky, keep your knees in line with your toes, and launch your hips through.

In a relatively short amount of time you will see an increase in speed by integrating plyometric training and emphasizing the SSC. A comprehensive program to increase speed should include an effective warm up, speed training, plyometrics, and strength and power movements. Be sure to rest 48 to 72 hours between plyometric workouts to maximize results!


Privacy Settings
We use cookies to enhance your experience while using our website. If you are using our Services via a browser you can restrict, block or remove cookies through your web browser settings. We also use content and scripts from third parties that may use tracking technologies. You can selectively provide your consent below to allow such third party embeds. For complete information about the cookies we use, data we collect and how we process them, please check our Privacy Policy
Youtube
Consent to display content from - Youtube
Vimeo
Consent to display content from - Vimeo
Google Maps
Consent to display content from - Google
Contact us to get started today! Learn More