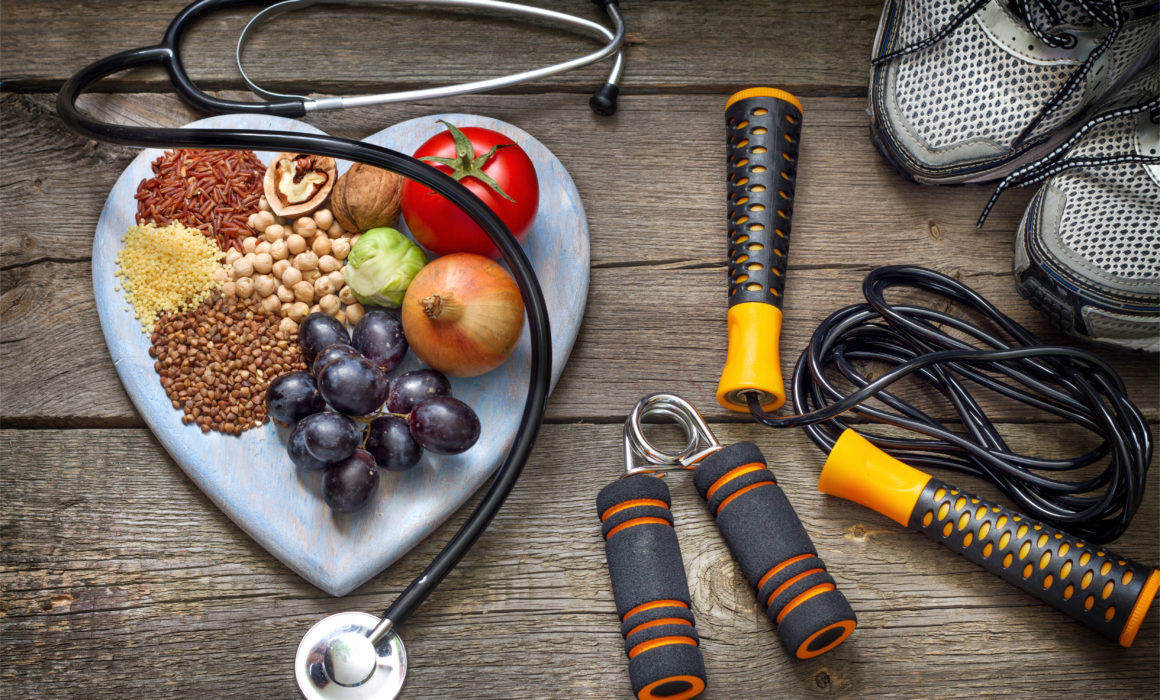
What’s Better, High Intensity or Low Intensity Training?

What’s Better, High Intensity or Low Intensity Training?

What type of exercise is better for your body—high intensity or low intensity training? The answer is not that simple. It comes down to individual goals and how your body responds to exercise on a given day. Is your goal to decrease your body fat percentage, increase your VO2 max, recover faster, or have more power for anaerobic work? Different energy systems are used when performing high and low intensity workouts as well as a different ratio of carbs vs. fats burned within the body.

Low intensity exercise is aerobic work where your heart rate stays within 60-80% of your max heart rate. Working on your endurance boosts your heart’s left ventricle that pushes blood out to the rest of the body to increase in capacity. That means that more oxygen gets delivered to nourish crucial tissues and organs which support better overall health. Not only does more oxygen reach crucial parts of the body, but your circulatory system gets better at transferring it from blood to tissue. That’s because low intensity exercise increases capillary density, so more channels are on hand to deliver oxygen to the tissue’s cells. This in turn increases base oxygen intake leading to enhanced endurance.

High intensity exercise, often referred to as HIIT (high intensity interval training) or SIT (sprint interval training), burns more calories in a shorter period of time compared to the time put in for low intensity training. However, high intensity exercise escalates your resting metabolism so you burn more calories post exercise. The high intensity nature provides improved athletic capacity and condition as well as improved glucose metabolism. High intensity may not be as effective for treating hyperlipidemia and obesity, but has been shown to build more lean body mass and increase recovery time which is more applicable to sports performance athletes.

You get more bang for the buck when muscles burn fat because fat has more than twice the number of calories (nine calories vs. four calories per gram from carbs). Fat is the high-test fuel. Less oxygen reaches the muscle when you exercise hard, or fast, and get out of breath. The term “sucking wind” means that you are working hard to get more oxygen in. When less oxygen reaches the muscles, known as oxygen debt, carbohydrates become the preferred fuel because they burn completely with less oxygen.

With the information above, can we now narrow down what type of exercise is right for you? The simple answer is to combine both high and low intensity exercise into your routine. Where it gets confusing is when we ask ourselves, “what ratio of each should I do? 50/50?”. This is where it becomes individualized. The most popular ratio, and what I use for metabolic workouts, is based on Olympic programming. This breaks down low, moderate, and high intensity workouts into a ratio of 80% low, 12% moderate, and 8% high intensity throughout the week. After looking at these numbers, doesn’t the ratio of high intensity workouts seem very low?

The reason is that low intensity exercise promotes longevity and muscle recovery when done correctly. An overdose of high intensity exercise has its downsides. Although it is a great way to increase resting metabolism, crush carb stores in the body, and increase VO2 max, it is a sympathetic stressor and can lead to adrenal fatigue. In large doses, high intensity puts an incredible strain on your nervous system, joints and muscles; especially if you are overweight and unfit. It also puts you at a high risk of overtraining, which is a real danger as it can ruin your immune system, cause insomnia, affect your appetite, and release cortisol, which in turn can make you more likely to put on fat.

I would love to see more individuals build an excellent oxidative system base through low intensity exercise while slowly adding in high intensity training one day per week so their bodies can adapt appropriately. Work your way up to the 80%, 12%, and 8% and then get creative with your workouts. So long as you’re in the correct energy system, you may do CrossFit, Tabata, 5K’s, marathons, sprints, lifting—take your pick!



3 Tips for Maximum Recovery

3 Tips for Maximum Recovery

As an athlete or gym warrior, it’s easy to get caught up in the barbells, sleds, and plyo boxes. While what you do in the gym is unbelievably important, taking care of your body when you’re not at the gym is equally as important. I have put together a list of 4 tips for maximum recovery to keep you at the top of your game.

Get Moving

One of the worst things that you can do on your recovery days is to be a couch potato. When we workout, our body produces byproducts like lactic acid, pyruvate, and NADH+. These byproducts pool up and cause our muscles to be sluggish, slow and sore. In order for our body to get rid of these byproducts, it requires blood flow to carry them out of our muscles. A blood flow elevated above resting will help to drain these byproducts from our muscles and speed up recovery.

Tips for moving during a recovery day:

  • Go for a light jog/walk
    • Just get your heart rate up, don’t push it
  • Foam roll
    • Spend 20-30 seconds on each of the major muscles
    • Glutes/Hamstrings/Calves/Quads
    • Lats/Upper back/Pecs
  • Lacrosse ball
    • Spend some time isolating specific knots or trigger points
    • Place the lacrosse ball on the knot and slowly grind into it
  • Stretch
    • Stretch the major muscles. If you neglect mobility, over time you will develop pain and injuries because the muscles aren’t functioning the way they should.
    • Spend 20-30 seconds on each muscle
    • Dynamic stretching combined with a light jog/walk is a great combo

Eat Right

Proper fuel is absolutely essential for competitive athletes. In order for our bodies to function properly at competition, they need fuel. Not only do they need fuel, they need the right fuel. Think of your body like a car. You could fill your car up with bleach and it would run … but not for long. If you’re filling your body up with junk food and missing out on the right nutrients, your body won’t perform the way you want it to for very long.

Tips for improving your nutrition:

Sleep

One of the biggest factors that significantly influences your body’s performance is sleep. Proper sleep has been shown to increase performance, motivation, concentration, and improve cognitive performance. While we are sleeping, our bodies go to work. During sleep, your body increases the hormone productions that lead to rebuilding muscles, increasing the tensile strength of your actin and myosin within the muscle fibers. It is recommended for athletes to get anywhere from 7-9 hours of sleep each night. If you are in the middle of pre-season or heavy training times, an extra hour is typically recommended. If you can’t manage to get that much sleep at night, naps can be a way to add up to that sleep total.

Tips for getting good sleep:

  • Get in a rhythm and stick to it! Plan ahead, finish homework/work in time that you can get to bed at a consistent time
  • Avoid being on your phone in bed, the stimulus will fight your body wanting to sleep
  • Avoid caffeine in the second half of the day

Simple Nutrition Guide to Launch into a Healthy Lifestyle

A sound nutrition plan is all about energy balance. This is the relationship between calories in and calories out. Other key factors that contribute to launching a healthy lifestyle include macro and micro nutrients. These play a key role in your metabolism and hormones which contributes to how your body processes food for energy. This nutrition guide will help you launch into a healthy lifestyle whether your looking to lose weight, increase lean body mass, or just looking to improve your eating habits.

Purpose of Each Nutrient

  • Carbohydrates for energy, cognitive function at work, primary fuel source, transports protein
  • Fat for anti-inflammation, cell structure, brain development and nerve function
  • Protein for recovery and repair of muscle tissue and cells, meal satiety
    • Distribution/Timing of protein throughout the day is essential.
  • Fiber for healthy digestive system, positive mood, efficient metabolism
  • Establish balance with proper caloric deficit to have fueling that supports energy needed for workouts while making progress towards body composition

Hydration

  • Proper hydration is critical for energy, nutrient absorption/digestion and mental clarity
  • ~1 cup of fluids 15-20 minutes before exercise
  • ~1 cup every 15-20 minutes during exercise

Identify Your Energy Needs

Breakfast Example

  • 2 different servings of fruit.
    • For example – 1 whole orange and 1 cup raspberries. It must be fresh or frozen.
  • With 1/4 cup raw walnuts or 20 raw almonds.
  • Plus 6 oz. plain Greek yogurt or 1/3 cup chickpeas or ½ cup quinoa.
  • Drink 16 oz. of water or hot or iced tea or coffee.

Lunch Example

  • Prepare a large salad with variety of veggies (aim for minimum of 3 different colors)
    • (Combining bag salads works well. Be sure to include a dark green)
  • Top with ¼ cup chopped walnuts, or 20 almonds or ¼ cup sunflower seeds
  • Rebuild lean muscle w/ 1/3 cup beans (pinto, kidney, chickpea, black (rinse if canned)).
  • Add 1 apple, diced with skin (or 1 serving any other fruit.)
  • Have with 1 tablespoon of any salad dressing that you like – vinegar and olive oil or salsa are two options. Drink water or alternative beverage such as tea.

MOVE today!

  • Get as much exercise as you can, preferably 1 hour of movement–walking, swimming, stationary bike, etc.

*If you get snackie during the afternoon, have 1 serving fresh fruit or more veggies.

Dinner Example

  • Prepare stir fried vegetables (minimum of 3 colors and use a little olive oil)
  • Top with ¼ cup sliced almonds, walnuts or sunflower seeds
  • Power up with protein from 1/3 cup beans, rinsed (red, pinto, kidney, black.)
  • Flavor the stir fry with fresh herbs and spices or spice mixes.

PM Snack

  • Thaw ¾ cup berries and drizzle 1 small square melted dark chocolate on top.
  • Key is having casein protein: cottage cheese, frozen Greek yogurt, protein shake, milk

Meal Guide

  • Breakfast – Pick from each category:
    • Energizing carb: black beans – whole wheat toast – sweet potato hash – oatmeal
    • Lean protein: Greek yogurt – eggs – hemp seeds – turkey – protein powder
    • Antioxidant fruits: blackberries – strawberries – blueberries – pineapple
  • Lunch – Pick from each category:
    • Lean meat: chicken – ground turkey – white fish
    • Complex carb: quinoa – brown rice – sweet potato – whole wheat pasta – WG bread
    • Vegetable: asparagus – broccoli – peppers – zucchini/squash – kale – and many more!
  • Dinner – Pick from each category:
    • Lean meat (5-6 days/wk): chicken – ground turkey – white fish
    • High fat (omega) meat (1-2 days/wk): salmon – quality steak – tuna

Foods Supporting Digestive Health

  • Ground flaxseed
  • Kiwi
  • Oatmeal
  • Beans
  • Kombucha or other fermented food (sauerkraut, kimchi, miso, kefir)

Anti-Inflamtory Foods

  • Salmon
  • Tuna
  • Walnuts
  • Pineapple
  • Watermelon
  • Tumeric
  • Tart Cherry concentrate

Foods that Boost Fat Metabolism

  • Red grapefruit
  • Coffee (black)
  • Lentils
  • Water
  • Whole grains high in B vitamins

Foods that Increase Endurance

  • Spinach
  • Beets
  • Arugula
  • Celery
  • Potato starch

Foods that Support Immune Function

  • Tomatoes
  • Red Bell Pepper
  • Citrus (oranges, lemons)
  • Yogurt
  • Green tea
  • Ginger

Prime Your Body For Results with This Short Stationary Dynamic Warm Up

Prime Your Body For Results with This Short Stationary Dynamic Warm Up

Are you doing a dynamic warm up before your workout routine? If you’re not, you could be leaving performance benefits on the table and potentially putting yourself at risk for injury. I know it may not always be practical to spend 15 minutes going through a dynamic warm up, but it is important that you elevate your heart rate, take your body through full range of motion, and activation your muscles before doing any workout routine.

5 benefits of a dynamic warm up

  1. Increase core body temperature
  2. Increase blood flow
  3. Lubricate joints
  4. Enhance joint mobility/flexibility
  5. Muscle activation

If you’re short on time and have limited space, this is the perfect warm up routine for you. Perform this  short stationary dynamic warm up prior to your workout to prime your body for max results!

Exercises

Jumping Jacks (30 reps)


Split Jacks (30 reps)


Cross Jacks (30 reps)


Knee Hug w/ Ankle Circle (6 reps each)


Quad Stretch w/ Forward Lean (6 reps each)


Inverted Toe Reach (6 reps each)


T-Spine Lunge w/ Rotation (6 reps each)


Infant Squats (8 reps)


Which is Better, Dynamic or Static Stretching?

Which is Better, Dynamic or Static Stretching?

Dynamic and static stretching has been a discussion topic in the fitness industry for quite some time. The main thing to keep in mind is that everyone’s body is different as well as their perception of“fitness” and “mobility.” We all have some form of  compensation or tightness within our muscular system. Again, this is where an individual may apply static and dynamic stretching differently. It is very important to be open minded and pay attention to your body specifically. Even the best fitness
professional in the world doesn’t know your body as well as you do.

What is dynamic stretching?

This form of stretching is defined on www.dictionary.com as: “A type of sports fitness routine in which momentum and active muscular effort are used to stretch and the end position is not held.” The high knee movement is an example of dynamic stretching because it is constantly changing while stretching and activating your muscles. The key word here is “activating.”

 What is static stretching?

Defined by http://www.humankinetics.com, “static stretching means a stretch is held in a challenging but comfortable position for a period of time, usually somewhere between 10 to 30 seconds. Static stretching is the most common form of stretching found   in general fitness and is considered safe and effective for improving overall flexibility.” Holding the stretching position in this fashion inhibits muscle activation and puts your body in a relaxed, parasympathetic, recovery state. Foam rolling is another way to get the same response as static stretching.

Which is better, static or dynamic stretching?

Now that we have defined the two different types of stretching, when is the optimal time to incorporate each type around your workout? We know that dynamic stretching is a form of muscle activation, while static stretching inhibits muscle activation, therefore making your workout more productive from the start when we dynamically stretch the body. On the other hand, if you are a person with muscle tightness and lack functionality because of this, you may benefit more from static stretching before exercise. If your mobility is sub-par and you can’t get into a good position during an exercise, itdoesn’t matter how much activation you have done beforehand because your body is compensating with some other muscle that shouldn’t be the prime mover for the exercise.

So how do I know if my body needs static or dynamic stretching before exercise? This is where I have found a way to get the most out of your workout. For the clear majority of people, we incorporate foam rolling and static stretching, as well as dynamic stretching, before the workout—in that order.

Foam rolling should be the first thing you do when you are preparing to exercise. It aids in priming the muscles for stretching by increasing blood flow and releasing the muscle fibers and tightness. Now you can incorporate light static stretching that is specific to your workout. If you are doing overhead pressing movements, target your shoulder, chest, and latissimus dorsi muscles to reach the range of motion needed for the correct position in that exercise. Following light static stretching is then metabolic warm  up and dynamic stretching. The metabolic warm up helps prime the body with oxygen and creates blood flow to the muscles to make them more elastic and less prone to injury. Incorporating the dynamic warm up will activate your muscles for optimal strength and power so you can accomplish more during your workout! It’s that easy folks.

Keep in mind that people who may be hypermobile in certain areas should not partake in static stretching before or after exercise, as it may be harmful to your body. I didn’t spend much time going over the type of stretching that should be done post-workout because it is apparent. We want to recover after a workout to make our transition from a sympathetic state to a parasympathetic state so we can promote recovery faster and feel better overall. This means static stretching and foam rolling. For a recap, I made a list below of the optimal stretching order to incorporate around your workout.

-Foam Roll
-Light Static Stretching
-Metabolic Warm Up
-Dynamic Stretching

-Workout
-Foam Roll
-Static Stretching


How to Do a Turkish Get-Up

How to Do a Turkish Get-Up

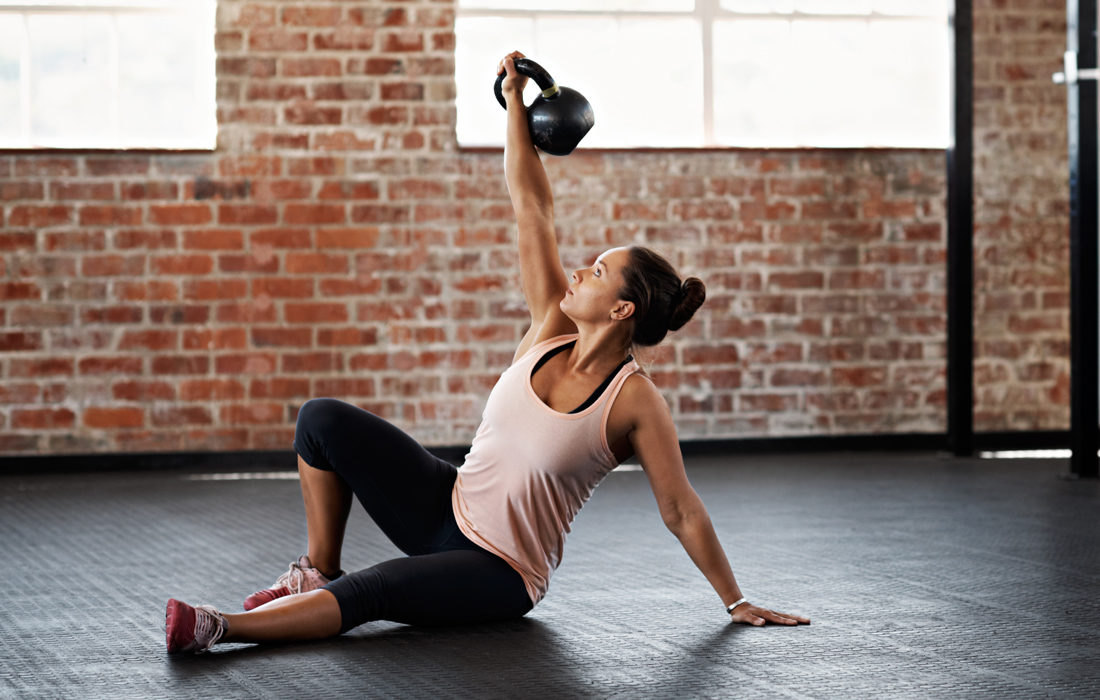
The Turkish Get-Up is an exercise that dates back to ancient wrestlers in what is now Turkey to prepare themselves for competitions. This is a great ancient exercise with present day benefits. The Turkish Get-Up is a total body exercise that increases strength, stability, mobility, balance and coordination. It can be used in a warm-up, as an assessment of overall strength and mobility, and within a strength-training program. The Get-Up is generally performed with a kettlebell, but can also be used with a dumbbell. The Get-Up is a complex movement that requires coordination in order to execute properly, but the benefits of this exercise are well worth it.

Here are a few benefits of the Turkish Get-Up

  • Single leg hip stability during the initial roll to press and during the bridge
  • Shoulder stability
  • Incorporates all three planes of movement
  • Thoracic extension and rotation
  • Hip and leg mobility and active flexibility
  • Stability in two different leg patterns – lunge stance as well as squat stance
  • Both rotary and linear stability
  • Ankle mobility
  • The ability to link movement created in our extremities to the rest of our body

Step-by-step guide on how to properly execute the Turkish Get-Up

  1. Starting position – Lie on your back with kettlebell or dumbbell in your right hand – straight up in the air. Right knee will be bent with foot planted firmly on the ground and the left leg is straight on the ground. Left arm is straight on the ground, at a 45 degree angle.
  2. Elbow – With your right foot being firmly on the ground, roll onto your left elbow, with weight still above head.
  3. Hand – Once you have shifted weight to the elbow, continue rolling up until your weight is supported in your left hand. You should have 3 support points – left hand, left glute, and right foot.
  4. Bridge – Lift your hips off the ground keeping your right arm extended straight overhead, and your weight in your left hand. Keep looking up at the weight and keep it overhead.  You should have 2 support points – left hand and right foot.
  5. Leg Swing – With hips still lifted in the bridge, swing your left leg under your body, and place your knee on the ground underneath you.
  6. Kneel – Take your left hand off of the floor and straighten up so your body is upright. Turn your legs so that they are parallel to each other.
  7. Stand up – Drive your back foot through your hips and into your front foot, stand up from the lunge – keeping the weight straight overhead and look at the weight.
  8. Reverse Lunge – Keep the weight overhead, and step your left foot back in a reverse lunge, lowering your knee to the ground – with legs parallel.
  9. Lowering Hand – Swinging hips, lower left hand down to the ground.
  10. Swing leg – Now that your hand is on the ground, swing your left leg back to the front of you – with your weight in your left heel, left hand, and right foot.
  11. Elbow – Lower your weight back to your elbow – with contact points being your left elbow, left butt cheek and right foot.
  12. Finish – Lower your torso down to the ground and end in the beginning position.

The Turkish Get-Up can be modified for beginners and people dealing with injuries. Possible modifications would be to lighten the weight, no weight, Stage 1 Get-Up, or Stage 2 Get-Up.

Stage 1 Get-Up


Stage 2 Get-Up


How to Navigate the Holiday Seasons While Staying Healthy

How to Navigate the Holiday Seasons While Staying Healthy

Successfully getting through the holidays requires more than just knowing what healthy food looks like, it is the mindfulness and establishing a behavior change when at social events and food gatherings. Slow down with eating, savor your food, enjoy the moment of the holiday events and not just focusing on the food.

  • Breathe between bites of food
  • Pay attention to physical hunger cues vs emotional eating or mindless eating
  • Set your fork down in between eating
  • Use a smaller appetizer plate, you can always grab seconds but don’t to overload a large dinner plate
  • Bake holiday treats year round not “last chance eating” and overeating a “one time food”
  • Eat what you love, leave what you like
  • Alternate your bubbly cocktails w/ sparkling water
  • Be a snack smuggler – keep appetite in check and nourish your body rather than letting blood sugar drop and grabbing fast food

Social Gatherings

Holidays are much more than 100% food. Consider all the other aspects that make the holidays special and unique and go into the various events emphasizing those factors and not just thinking about food and what you will eat. Challenge yourself to do two non food related tasks before starting in on food.

  • Go to social gatherings to gather, not to eat
  • Keep plate at table and socialize without a plate in your hand (prevents mindless eating)
  • Hang out with family and friends in a living room or alternative space instead of chatting around food
  • Eat mindfully = three bites and goodnight
  • Give yourself permission to enjoy your indulgences guilt free

10 Healthy Cooking Alternatives

    1. Gravy — Refrigerate the gravy to harden fat. Skim the fat off. This will save a whopping 56 g of fat per cup.
    2. Mashed potatoes – swap out for cauliflower
    3. Stuffing — Use less bread and add more onions, garlic, celery, and vegetables. Add fruits such as cranberries, apples or pears.
    4. Sweet potatoes – add in other vegetables for more color & nutrients such as butternut squash, beets, brussel sprouts
    5. Green bean casserole – use a skim milk with Greek yogurt for a creamy, but lower calorie alternative
    6. Turkey – Enjoy delicious, roasted turkey breast without the skin and save 11 g of saturated fat per 3 oz serving
    7. Ham – opt for nitrite free ham and keep your portion in check to reduce excess sodium
    8. Pumpkin pie – substitute with plain Greek yogurt and flaxseed = increased protein and 100 calories less per slice
    9. Cherry pie – use fresh fruit instead of “pie filling” and for the crust – whole wheat flour + ground flaxseed
    10. Cookies – use unsweetened applesauce instead of oil

GARLIC MASHED CAULIFLOWER

Ingredients

  • 1 cauliflower whole head, separated into florets
  • 1 garlic whole bulb
  • 1 teaspoon olive oil
  • 2 teaspoons thyme fresh chopped
  • 1/4-1/2 teaspoon kosher salt or to taste
  • 1/4 teaspoon black pepper freshly ground

Instructions

  1. Preheat oven to 400 degrees.
  2. Slice about 1/4″ from the head of garlic and drizzle olive oil over the exposed cloves. Wrap garlic in aluminum foil and roast for 40-50 minutes, until soft. Remove from oven and cool until you can handle it.
  3. Meanwhile, set a vegetable steamer into a pot or saucepan with a lid. Add an inch of water to the pot and fill the steamer basket with the cauliflower florets. Cover the pot and bring the water to a boil. Cook cauliflower until very tender (so that when you pierce it with a knife it goes in and comes out easily without catching), about 10 minutes.
  4. Transfer cauliflower to a food processor. Squeeze the individual cloves of roasted garlic into the cauliflower. Add the thyme and secure the lid on the food processor. Pulse the cauliflower mixture until there are no lumps and it’s smooth like mashed potatoes. This may take a few minutes.
  5. Season with salt and pepper to taste. Serve.

APPLE AND SQUASH STUFFING

Ingredients

  • 4 cups butternut squash, peeled and cubed
  • 2 onions, chopped
  • 2 stalks celery, diced
  • 2 cups Gala apples, peeled and diced
  • 1 clove garlic, chopped
  • 1/3 cup olive oil
  • Optional – 4 slices pancetta, about 1/4-inch (1/2-cm) thick, diced
  • 1 lb ground turkey
  • 2 teaspoons Dijon mustard
  • 8 cups cubed stale bread loaf without the crust
  • 3 cups chicken or beef broth
  • 2 eggs, lightly beaten
  • 1 cup walnuts, toasted and chopped
  • Salt and pepper

Instructions

Butter a large 33 x 23-cm (13 x 9-inch) baking dish or with a capacity of at least 12 cups.

In a large and deep non-stick skillet or a large saucepan, sauté the squash, onions, celery, apples, and garlic in half the oil for about 10 minutes. Season with salt and pepper. Transfer to a large bowl.

In the same skillet, brown the ground meat (and pancetta if using) in the remaining oil. Add the mustard. Season with salt and pepper. Spoon over the vegetables and add the remaining ingredients. Stir to combine and spoon into the baking dish. Bake the stuffing in the oven during the last 30 minutes of cooking the turkey, on the bottom rack. While the turkey is resting, increase the oven’s temperature to 350 °F and bake the stuffing for another 30 minutes or until it is firm and golden brown.

GREEN BEAN CASSEROLE

Ingredients:

  • 2 pounds fresh green beans, trimmed and cut into bite-sized pieces
  • mushroom sauce (see below)
  • crispy onion topping (see below)

CRISPY ONION TOPPING INGREDIENTS:

  • 1 Tablespoon olive oil or butter, divided
  • 1 medium onion, peeled, quartered and thinly sliced
  • 1/2 cup Panko breadcrumbs
  • 1/4 cup freshly-grated Parmesan cheese
  • 1/4 teaspoon salt

MUSHROOM SAUCE INGREDIENTS:

  • 2 Tablespoons butter or olive oil
  • 8 ounces white button or baby bella mushrooms, thinly sliced
  • 4 cloves garlic, minced
  • 3 Tablespoons all-purpose flour (or cornstarch, if gluten-free)
  • 1/2 cup chicken or vegetable stock
  • 1 cup milk
  • 1/2 cup Parmesan cheese, grated (not packed)
  • 1/2 teaspoon salt
  • 1/4 teaspoon ground black pepper

Instructions:

TO MAKE THE CASSEROLE:

Begin by preparing the onion topping.  Then make the mushroom sauce.

While those are cooking, preheat oven to 375 degrees and bring a large stockpot of water to a boil.  Add the green beans and boil for 3-5 minutes, or until they reach your desired level of doneness.  (I like mine cooked but still slightly crispy.)  Drain the green beans, then transfer them to the bowl of ice water and stir them in.  This will stop them from cooking more.

When the mushroom sauce is ready, transfer the green beans into the pan with the sauce and toss until combined.  Pour the green bean mixture into a baking dish that has been greased with cooking spray.  Then sprinkle the onion topping evenly on top.  Bake for 25 minutes.  Serve warm.

TO MAKE THE CRISPY ONION TOPPING:

Heat half of the butter in a large saute pan over medium-high heat until melted.  (Or if using olive oil, heat until it is shimmering.)  Add the onions and saute, stirring occasionally, for about 5 minutes or until they are soft and starting to brown around the edges.  Use a slotted spoon to transfer the onions to a separate mixing bowl.

Add the remaining half tablespoon of butter (or oil) to the pan and heat until melted.  Add in the Panko breadcrumbs and stir until combined.  Cook, stirring once every 30 seconds or so, for about 3-5 minutes until the Panko is toasted and lightly golden.  Remove from heat and transfer the Panko to the bowl with the onions.  Stir in the Parmesan and salt, and toss the mixture until combined.  Set aside.

TO MAKE THE MUSHROOM SAUCE:

In the same saute pan that you used to cook the onion and Panko, heat butter in a large saute pan over medium-high heat until melted.  (Or if using olive oil, heat until it is shimmering.)  Add mushrooms and saute for 3-5 minutes until they are soft and cooked, stirring occasionally.  Add the garlic and saute for an additional 1-2 minutes until fragrant, stirring occasionally.  Sprinkle with flour, and stir to combine. Saute for an additional minute to cook the flour, stirring occasionally.

Slowly add chicken broth, whisking to combine until smooth. Whisk in milk, and bring the mixture to a simmer. Let cook for an additional minute until thickened, then stir in Parmesan cheese, salt and pepper until the cheese is melted. Reduce heat to low until the sauce is ready to be tossed with the green beans.

(*If the sauce seems too thick, you can add in an extra 1/2 cup of milk.  If the sauce is too thin, you can add in an extra 1/4 cup of Parmesan cheese.)


HEALTHIER PUMPKIN PIE

Ingredients

  • 1 can (15oz) pumpkin puree
  • 1 (13.5oz) can full-fat coconut milk
  • 1/4 cup rolled oats
  • 2 tbsp ground flax
  • 1/3 cup coconut sugar or brown sugar
  • pinch pure stevia, or 2 tbsp extra brown sugar
  • 2 tsp cinnamon
  • 1 tsp pumpkin pie spice
  • 1/2 tsp salt
  • 1 tbsp pure vanilla extract

Instructions

Preheat oven to 400°F. Blend all ingredients together until smooth, then pour into a prepared pie crust (such as the recipe below) in a 10-inch round pan. Bake 27 minutes (it will still be underdone after this time, which is okay!), let it cool, then refrigerate at least 5 hours uncovered for the pie to thicken and “set.” Note: Feel free to experiment with other milks, I can’t vouch for the results but that is an option.

Crust Recipe:

1 1/2 cups whole wheat pastry flour or all-purpose flour
1 tsp salt
1/3 cup xylitol or sugar of choice
1/2 cup avocado oil or coconut oil
2-4 tbsp water

Preheat oven to 200°F. In a large mixing bowl, combine all dry ingredients. Add oil and stir. Add water as needed until it just sticks together but is not gummy. Press evenly into a 10-inch pie pan. Put the crust in the oven and immediately increase the temperature to 350°F. (The crust will rise, so either use pie weights during baking or just press the pie crust back down afterwards.) Bake 15 minutes. Let cool.

GINGERBREAD COOKIES

Ingredients:

  • 1 cup + 6 tbsp white whole wheat flour
  • ¾ tsp cornstarch
  • ¼ tsp baking powder
  • 1 ½ tsp ground ginger
  • ¼ tsp ground cinnamon
  • ⅛ tsp ground nutmeg
  • ⅛ tsp ground cloves
  • ¼ tsp salt
  • 2 tbsp (28g) unsalted butter or coconut oil, melted and cooled slightly
  • 1 large egg, room temperature
  • 1 ½ tsp vanilla extract
  • ¼ cup molasses
  • 1 tsp vanilla crème stevia

Instructions

  • To prepare the cookies, whisk together the flour, cornstarch, baking powder, ginger, cinnamon, nutmeg, cloves, and salt in a medium bowl. In a separate bowl, whisk together the butter, egg, and vanilla extract. Stir in the molasses and vanilla crème stevia. Add in the flour mixture, stirring just until incorporated. Transfer the dough to the center of a large sheet of plastic wrap, and shape into a 1”-tall rectangle. Cover the top with another large sheet of plastic wrap. Chill the dough for at least 1 hour.
  • Preheat the oven to 325°F, and line two baking sheets with silicone baking mats or parchment paper.
  • Leaving the cookie dough between the sheets of plastic wrap, roll it out until ⅛” thick. Lightly flour your cookie cutter, and press it into the dough, making sure each shape lies as close to its neighbors as possible to minimize unused dough. Peel the unused dough away from the shapes, and place them onto the prepared baking sheets. Re-roll the unused dough, and repeat.
  • Bake the cut out cookie dough at 325°F for 8-10 minutes. Cool on the baking sheet for 5 minutes before turning out onto a wire rack to cool completely.

SUGAR COOKIES (Grain-free, gluten free and refined sugar free!)

Ingredients

Wet

  • 1 large egg
  • 1 teaspoon almond extract
  • 1/4 cup honey
  • 2 tablespoons coconut oil, melted
  • optional: food coloring

Dry

  • 2 cups blanched almond flour
  • 1/2 cup coconut flour
  • 1/2 teaspoon baking soda
  • pinch salt

For the Icing

  • 2 cups organic powdered sugar
  • 2-3 tablespoons water
  • 2-3 drops pink/red food coloring

Toppings

  • Sprinkles
  • Edible Glitter

Instructions

  1. Preheat oven to 350ºF and line 2 baking sheets with parchment paper. Set aside.
  2. In a medium-size bowl, whisk together dry ingredients and set aside.
  3. In a large bowl, whisk together egg, almond extract, and honey. Then, add in melted coconut oil and whisk again.
  4. Slowly add dry ingredients to wet until your dough is formed. Use a wooden spoon at first and then switch to using your hands. The dough may seem crumbly at first, but continue to knead dough together until it forms a ball.
  5. At this point, you can add your food coloring. We suggest starting off with just a few drops and kneading the food coloring into the dough. You can also make multiple colors of dough by separating in half or thirds.
  6. Create a ball with your dough and wrap with plastic wrap and place in refrigerator for 30 minutes.
  7. Once the dough has cooled. Remove from fridge and sprinkle coconut flour onto a hard, cool surface as well as your rolling pin. Then, use rolling pin to roll out the dough so that it’s around 1/4 to 1/2 of an inch thick. If it’s sticking, sprinkle on some more coconut flour.
  8. Use small/medium cookie cutters to create sugar cookie cut outs. Place shapes onto your parchment-lined baking sheet. Don’t worry about spacing too much, the cookies will not expand that much.
  9. Bake at 350ºF for 6-8 minutes or until cookies begin to brown. They cook fast, so be careful!
  10. Immediately remove from hot pan and place on cookie rack. Let cool for at least 30 minutes before frosting.
  11. For the icing: add water to powdered sugar one tablespoon at a time and mix. Add enough water, until you’ve reached your desired thickness. If you want to color your frosting, add a few drops of whatever color you desire. Then, transfer into a piping bag (or plastic bag) and frost away!
  12. Frost cookies with icing and then decorate with sprinkles and edible glitter.

INTERESTED IN MORE HEALTHY TWISTS ON CHRISTMAS COOKIES?

Check out: https://www.wellandgood.com/good-food/healthy-christmas-cookie-recipes/


5 Healthy Holiday Eating Tips

5 Healthy Holiday Eating Tips

Holiday Food Eating Facts

  • It is easy for holiday eating to turn into holiday OVER-eating.
  • We gain 1-2 pounds during this time and don’t lose it come January.
  • Research also shows those who are already overweight gain an average of 5 holiday pounds that don’t come back off and add up year after year.

Tip #1: Don’t Skip Meals

  • Don’t attempt to restrict intake leading up to the holidays…this will only make you more likely to overeat once the holiday meals come.
  • Practice well-balanced and healthful eating leading up to the holidays, including adequate fruits, vegetable, lean proteins, high fiber foods and whole grains.

Tip #2: Avoid Overeating…Moderation is key!

  • Enjoy, Stop, Think
  • Smaller plate, smaller portions
  • Drink water throughout the day, dehydration can be mistaken for hunger
  • It IS possible to have too much of a good thing
  • Balance portions on your plate
  • Moderation applies with dessert too – One whole piece of your favorite  dessert, or two half-sized pieces if you can’t decide

Tip #3: Veggies First

  • First fill your plate with vegetable and salad options before adding the entrees and desserts to the plate.
  • ↑ vegetables + ↓ entrees & desserts = ↓ calories, ↑ fullness, satisfaction, nutrients

Tip #4: Play Your Part

  • Bringing a dish? Make it a healthy option!
  • Sides: Fruit or vegetable tray, salad, roasted vegetables
  • Entrée: Lean meat, whole grain pasta, beans

Tip #5: Stay Active


Which is Better, Back Squat or Front Squat?

Which is Better, Back Squat or Front Squat?

Why Squatting is Important

The squat is a vital, natural, and functional component of your being. In the bottom position, the squat is nature’s intended sitting posture. Only in the industrialized world do we find the need for chairs, couches, benches, and stools. This comes at a loss of functionality that contributes immensely to decrepitude. “If you don’t use it, you lose it.” We see this far too often in today’s modern society. This non-usage of our bodies through all ranges of motion cause weak glutes and hamstrings which, in turn, causes improper squat form through poor engagement, weak control, or lack of awareness in the glutes and hamstrings.

Which is Better, Front Squat or Back Squat?

Most importantly, an athlete’s mobility should determine which lift is better suited to him or her. If you can safely perform one lift and not the other, the choice is apparent. The proper mobility at the shoulder, upper and lower back, hips, knees and ankles plays a huge part in the optimal squat type for an individual as they slightly differ from one another.

Front Squats require significantly more mobility than Back Squats. You need excellent thoracic spine mobility to keep your chest up, outstanding wrist flexibility and shoulder mobility to rack the bar, superb hip and groin mobility to squat low with your knees in line with your toes, and great range of motion (ROM) through the ankles to keep your lower back from rounding. One pro to front squats is the ability to protect the shoulders more by using the clean grip or cross arm grip. I would recommend the front squat to individuals that are trying to increase their olympic lifts, such as cleans and snatches, as the grip carries over to the receiving phase in these movements.

Back squats focus more on the hips, glutes, and lower back, which is great training for movements that require hip extension. Another favorable aspect of back squats is the ability to add more load (weight) to the movement, which in turn adds to more overall strength throughout the body, specifically in the core.

Win-Win Collaboration

Back squats and front squats differ in their positioning and targeted muscles; however, there are benefits to both variations. When used in conjunction with one another, these two exercises can reap huge benefits for the athlete and elevate performance. Unless you are an overhead athlete or have lower-body injury/mobility issues, front squats and back squats are imperative to your lifting program, especially if you are training your lower body twice a week.

By: Tandy Juell

Performance Coach


Enhance Your Mobility With This 5 Minute Routine

Mobility Series

Flexibility

Flexibility is the absolute range of motion in a joint or system of joints, and the length of muscle that crosses the joint involved. It directly correlates with range of motion and mobility.  Range of motion is the distance and direction the joint can move, while mobility is the ability to move without restriction.

Mobility

Even though mobility and flexibility sound similar they are slightly different. Mobility within a joint is the degree to which the area where two bones meet (known as an articulation) is allowed to move without being restricted by the surrounding tissue such as tendons, muscle, and ligaments. Think of mobility as the range of motion around the joint.

A good level of mobility allows a person to perform movements without restriction, while a person with good flexibility may not have the strength, coordination, or balance to execute the same movement. Good mobility does not always mean good flexibility.

Benefits of Increasing Your Mobility

  • Increased range of motion for increased strength potential.
  • More muscle activation.
  • Decreased risk of injury.
  • Decreased soreness and joint pain.
  • More fluid movements.

Try This Mobility Routine Performing Each Exercise for 30 Seconds

Foam Roll: Back

Foam Roll: Back Side to Side

Foam Roll: Glute

Foam Roll: Hamstring

Foam Roll: IT Band

Foam Roll: Quad

Foam Roll: Adductors

T-Spine Lunge

Leg Swings

Lying Knee Hugs

Side Lying T-Spine Rotation


Privacy Settings
We use cookies to enhance your experience while using our website. If you are using our Services via a browser you can restrict, block or remove cookies through your web browser settings. We also use content and scripts from third parties that may use tracking technologies. You can selectively provide your consent below to allow such third party embeds. For complete information about the cookies we use, data we collect and how we process them, please check our Privacy Policy
Youtube
Consent to display content from - Youtube
Vimeo
Consent to display content from - Vimeo
Google Maps
Consent to display content from - Google
Check Out Black Friday HOT DEALs for a Limited Time Only 11/25-12/2.Learn More