Which is Better, Back Squat or Front Squat?

Which is Better, Back Squat or Front Squat?

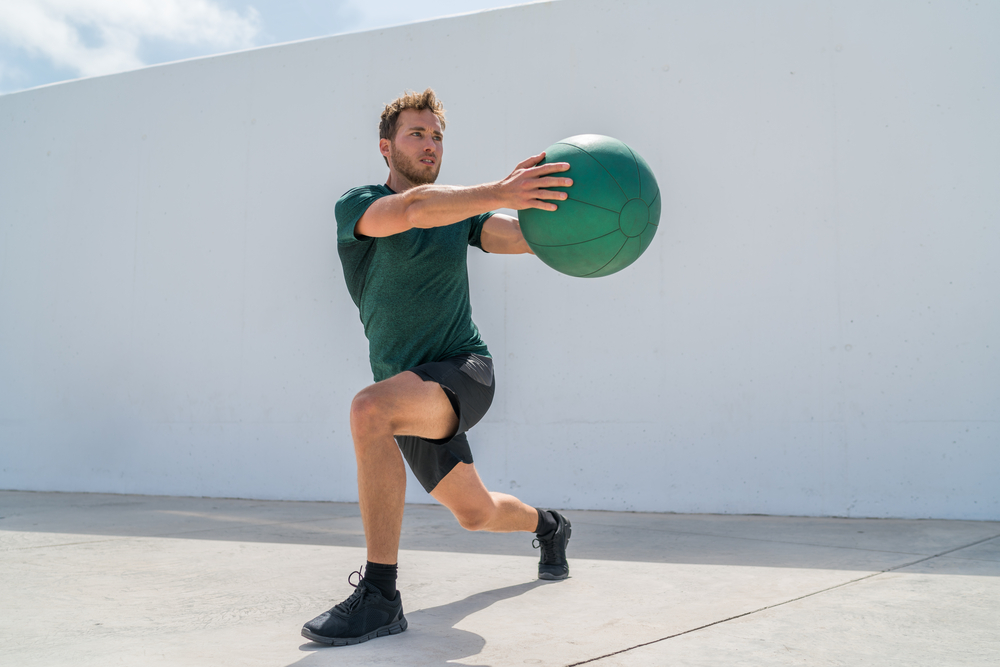
Why Squatting is Important

The squat is a vital, natural, and functional component of your being. In the bottom position, the squat is nature’s intended sitting posture. Only in the industrialized world do we find the need for chairs, couches, benches, and stools. This comes at a loss of functionality that contributes immensely to decrepitude. “If you don’t use it, you lose it.” We see this far too often in today’s modern society. This non-usage of our bodies through all ranges of motion cause weak glutes and hamstrings which, in turn, causes improper squat form through poor engagement, weak control, or lack of awareness in the glutes and hamstrings.

Which is Better, Front Squat or Back Squat?

Most importantly, an athlete’s mobility should determine which lift is better suited to him or her. If you can safely perform one lift and not the other, the choice is apparent. The proper mobility at the shoulder, upper and lower back, hips, knees and ankles plays a huge part in the optimal squat type for an individual as they slightly differ from one another.

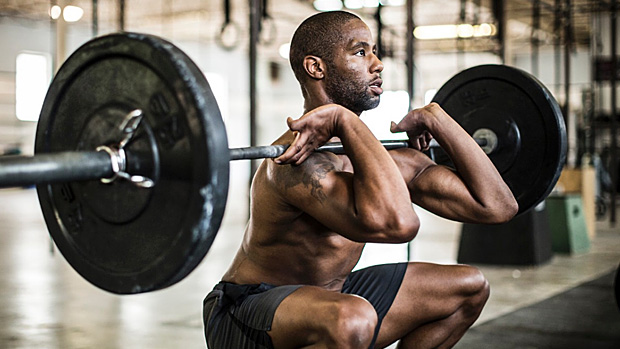
Front Squats require significantly more mobility than Back Squats. You need excellent thoracic spine mobility to keep your chest up, outstanding wrist flexibility and shoulder mobility to rack the bar, superb hip and groin mobility to squat low with your knees in line with your toes, and great range of motion (ROM) through the ankles to keep your lower back from rounding. One pro to front squats is the ability to protect the shoulders more by using the clean grip or cross arm grip. I would recommend the front squat to individuals that are trying to increase their olympic lifts, such as cleans and snatches, as the grip carries over to the receiving phase in these movements.

Back squats focus more on the hips, glutes, and lower back, which is great training for movements that require hip extension. Another favorable aspect of back squats is the ability to add more load (weight) to the movement, which in turn adds to more overall strength throughout the body, specifically in the core.

Win-Win Collaboration

Back squats and front squats differ in their positioning and targeted muscles; however, there are benefits to both variations. When used in conjunction with one another, these two exercises can reap huge benefits for the athlete and elevate performance. Unless you are an overhead athlete or have lower-body injury/mobility issues, front squats and back squats are imperative to your lifting program, especially if you are training your lower body twice a week.

By: Tandy Juell

Performance Coach


Enhance Your Mobility With This 5 Minute Routine

Mobility Series

Flexibility

Flexibility is the absolute range of motion in a joint or system of joints, and the length of muscle that crosses the joint involved. It directly correlates with range of motion and mobility.  Range of motion is the distance and direction the joint can move, while mobility is the ability to move without restriction.

Mobility

Even though mobility and flexibility sound similar they are slightly different. Mobility within a joint is the degree to which the area where two bones meet (known as an articulation) is allowed to move without being restricted by the surrounding tissue such as tendons, muscle, and ligaments. Think of mobility as the range of motion around the joint.

A good level of mobility allows a person to perform movements without restriction, while a person with good flexibility may not have the strength, coordination, or balance to execute the same movement. Good mobility does not always mean good flexibility.

Benefits of Increasing Your Mobility

  • Increased range of motion for increased strength potential.
  • More muscle activation.
  • Decreased risk of injury.
  • Decreased soreness and joint pain.
  • More fluid movements.

Try This Mobility Routine Performing Each Exercise for 30 Seconds

Foam Roll: Back

Foam Roll: Back Side to Side

Foam Roll: Glute

Foam Roll: Hamstring

Foam Roll: IT Band

Foam Roll: Quad

Foam Roll: Adductors

T-Spine Lunge

Leg Swings

Lying Knee Hugs

Side Lying T-Spine Rotation


10 Minute Bodyweight Core Circuit

10 Minute Bodyweight Core Circuit

A strong core enhances balance, stability, and energy transfer. Thus, it can help prevent injuries during day-to-day activities and sports injuries. Core strength directly correlates to exercise and sport activities like walking, jogging, sprinting, throwing, squatting, jumping, and swinging motions. The stronger your core is, the more efficient you will be at these activities. Through strengthening your core, you will see an increase in your fitness, performance, as well as minimize your risk for injuries.

When doing a core routine you want to incorporate exercises that target all of the muscles in your core musculature (see table below).

Core Muscle Groups

Pelvic floor muscles

Tansversus abdominis

Multifidus

Internal and external obliques

Rectus abdominis

Erector spinae (sacrospinalis)

Erector spinae (sacrospinalis)

Longissimus thoracis

Diaphragm

Latissimus dorsi

Gluteus maximus

Trapezius

Gluteus medius

Psoas major

Serratus anterior

Try this 10 minute bodyweight core circuit at home or at the gym

Perform 1 round of each exercise for 1 minute before moving onto the next. Take minimal rest between exercises. Complete

Plank  – 1 minute

Side Plank – 30 seconds each side

Dead Bug – 1 minute

Glute Bridge– 1 minute

Bird Dog– 1 minute

Half Kneeling Wood Chop – 30 seconds each side

Alternating Leg Lowers – 1 minute

Penguin – 1 minute

Russian Twist– 1 minute

Clams – 30 seconds each side


Advance Your Core Training with The Sling System

Advance Your Core Training
with The Sling System

The core is the foundation of your body. It links everything together and provides stability for athletic skills. So simply doing a few Sit-Ups or even Planks won’t cut it when developing an athletic core. The key is developing what is called the sling system. The sling is a group of contralateral (opposite) muscle groups that work in a diagonal fashion and that lie on the anterior (front) and posterior (back) portion of the trunk. The sling can be broken down into the posterior and anterior oblique slings. The primary function of the sling is to stabilize the pelvis and spine during movement, which enhances performance in all sports from track and field, football, baseball, golf and volleyball.

Anterior Oblique System

The anterior oblique sling system includes the external and internal oblique, opposing leg adductors complex, and hip external rotators. The oblique plays a key role in mobilizing and stabilizing gait. It functions by pulling the leg through during the swing phase. Athletic movements involve many moving parts. The anterior sling system helps stabilize the pelvis and spine during acceleration, deceleration and multi-directional movements. The anterior oblique system contributes to rotational forces and hip flexion and stabilizes the lumbo-pelvic-hip complex.

Here’s how to train it:

Posterior Oblique System

This system includes the gluteus maximus, latissimus dorsi and thoracolumbar fascia. The glute max and lat attach to the thoracolumbar fascia, which connects to the sacrum. Their fibers run perpendicular to the hip joint so when the opposite glute max and lat contract, the tension built up stabilizes that hip joint, enhancing energy transfer.

The posterior oblique subsystem contributes to propulsion when we walk, run or sprint. It is also a key contributor to rotational forces such as swinging a golf club or baseball bat, or throwing a ball. If there is any dysfunction in the posterior oblique subsystem, the hip joint will become unstable, leading to back pain. Someone with weak glutes and/or lats will most likely have a motor unit recruitment dysfunction leading to increased tension in the hamstrings and will be at a higher risk of recurring hamstring strains.

Here’s how to train it:

Take your core training to the next level by incorporating these exercises to optimize performance!


Decrease Injury with Deceleration Training

Decrease Injury with Deceleration Training

Sports are becoming increasingly competitive. In order to even be considered as a potential starter, athletes have to prove themselves. Coaches look for not only the most skilled athletes but also the most athletic. Parents and athletes are more aware of the importance of strength and conditioning training than ever before. As a result, most young athletes are falling into three categories:

  1. Athletes that have not been exposed to structured strength training techniques or speed and agility protocol. This group is at risk of overuse and soft tissue injuries because their joints and ligaments are not resilient and are susceptible to strains, tears, and stress fractures.
  2. Athletes that have been exposed to strength and conditioning along with speed and agility training, but have not been taught by a professional. Learning improper movement patterns and stressing them with high loads is a dangerous combination and will lead to injury.
  3. Athletes that have been exposed to a progressive periodized strength program that is appropriate for their age and experience. This group will have a solid foundation of strength, coordination, speed, agility, and power. They will have the advantage of performance benefits and less injury risk.

If we break down sports or athletics into its simplest form, it is a series of complex movements through multiple planes. Some are predictable and some are unpredictable. In order to prepare for sports, athletes must be able to tolerate the forces produced in their sport. If the forces required in the sport exceed the athlete’s ability to produce or absorb that amount of force, they are at greater risk for injury. It is estimated that there are around 80,000 ACL injuries each year. Let’s look into why these injuries may be occurring.

In the sports performance industry athletes are attracted to buzz words like speed, explosiveness, power, and vertical jump. All of these terms focus on acceleration movements or concentric muscle contractions. Putting a disproportionate focus on power and explosiveness will lead to a deficit in the ability to properly control the body when decelerating. Training specifically in the acceleration phase will primarily use concentric movements. In the leg we find that the quadriceps will become over-dominant and create an excessive amount of stress on the ACL. Therefore, it is important that athletes train athletes to use the hamstrings and glutes when decelerating, should be in our top priorities.

A lot of trainers and coaches don’t teach proper deceleration or landing mechanics. They may assume athletes know how to slow down, stop, and land. Now, they may be right in that most athletes can execute that task. However, the better question is can they slow down, stop, or land “properly”? Research supports that there are IDEAL positions and angles that athletes can put themselves in that will allow them to significantly decrease risk for injury simply by being in the right position while cutting, sprinting, or landing from a jump.

In order for athletes to prepare for the demands of their sport, it is important to incorporate these three elements into training:

  1. Emphasize the end of the drill – When performing agility or sprint drills, athletes should intently come to a complete stop abruptly when ending the drill instead of jogging or coasting. To decelerate, lower the hips and slightly over reach by contacting the ground in front of the hips. This will help enhance breaking ability over time.
  2. Focus on force reduction deceleration technique – Start deceleration drills off with an agility ladder and only perform the drills at 70%.  Really focus on digging the foot into the ground, coming to a complete stop, and maintaining low hips and proper body angle. Progress by increasing speed and more complex agility/plyometric drills.
  3. Add tempo into strength training – Emphasize the eccentric phase or the muscle lengthening phase of the lift. For example, instead of doing regular squats, descend down into the squat slowly for 3-10 seconds to work on controlling the load. Isometrics are also a great way to improve deceleration ability. Let’s use the same squat as an example. Descend down into the bottom of the squat and pause for 2-10 seconds before exploding upwards.

Linear Deceleration Technique

  • Hips down – 45 degree angle
  • Knees bent – Avoid <20 degrees of knee bend
  • Lean back – Contact should be nearly 45 degrees. Opposite of power line
  • Heel contact – Contact should begin with heel, roll to ball of foot, and press firmly into ground
  • Multiple steps – Spreading the force out of multiple steps greatly reduces chance of injury

Deceleration Drills

Linear Cone Drill

  • Set up cones 3 yards apart, sprint to the cones, decelerate into a lunge, backpedal to cones. Continue for designated sets/reps.

Lateral Hurdle Run w/ Pause

  • Set up 3-5 hurdles, laterally run over the hurdles, focus on a deep pause for about 2 seconds when changing direction.

Ickey Shuffle

  • Set up a ladder, run diagonally across the ladder, 2 feet in, 1 foot out. Focus on proper hip/knee angles on outside of ladder.

Depth Drop

  • Drop from a depth of 6”-18”, land simultaneously with both feet, very little/no hip drop, hips back, knees bent. Pause for 2 seconds.

Increase Your Speed with Plyometric Training

Increase Your Speed
with Plyometric Training

When you hear the term “plyometric,” most people think of jumping or jump training. However, plyometric is defined as an action that causes a muscle to reach maximal force in the shortest time possible. We can take the term “plyometric” and directly apply it to speed training. Before we do, let’s review how the stretch-shortening cycle (SSC) contributes to increasing your speed with plyometric training by breaking down the three types of muscle contractions.

  1. Eccentric Phase – This is the lowering phase where the muscle lengthens.
  2. Isometric Phase – The static muscle contraction that acts as the bridge between the eccentric and concentric phase.
  3. Concentric Phase– This is the phase when the muscle contracts and shortens to move the external load.

Anytime you perform dynamic movement you are utilizing the SSC. For example, let’s take a typical squat. When descending downward, your hips move back. Your knees bend. The quads, hamstrings, and glutes lengthen. This is the eccentric phase of the squat. At the end of the eccentric phase, right before you transition upward, there is a slight pause at the bottom of the squat. This is the isometric phase. As you transition upward, your quads, hamstrings, and glute muscles shorten. This causes your knees and hips to extend, completing the concentric phase.

Now that we have gone over the SSC, let’s dive into the relationship between plyometrics and the SSC. We know that plyometric is a rapid, maximal force movement.  The stretch-shortening cycle is a 3-phase muscle contraction involved in dynamic movements. Now how do they relate to one another? Plyometric training helps enhance the SSC by rapidly going through the eccentric, isometric, and concentric phases. This trains dynamic movements like sprinting and jumping to be more efficient and explosive.

So, how can you increase your speed with plyometric training? If we separate the three phases of the SSC and train them individually, you will see an overall increase in speed. We train the eccentric part of a movement to be able to absorb more energy and power. We then train the isometric phase, so that the force we generated and absorbed in our eccentric phase is not lost in transition from eccentric to concentric and actually adds to the force production. Finally, we focus on the concentric phase, ensuring that we get the highest rate of force development out of the movement.

  1. Eccentric – Train slow and focus on your landing! Allow your muscles to recruit the necessary energy in the weight-room and spend 3-8 seconds on the way down in each exercise. When jumping, focus on the initial contact to the ground–don’t waste the energy produced. Avoid knees going in or out, hips swaying, or chest falling forward.
  2. Isometric – Train at a stop, hold the landing! Allow your muscles to maintain the energy that has been produced. Get to the bottom of your exercise and hold it for 3-8 seconds. When jumping, land properly, then hold that landing position for 2 full seconds before standing up.
  3. Concentric – Train fast and focus on exploding! Allow your muscles to use the energy produced, come out of the bottom of the exercise quickly, but don’t sacrifice form!

(Pro tip: Decrease the amount of weight when doing concentric training until you can adequately control that weight.)

When jumping, focus on the up portion being as explosive as you can make it. Throw your chest to the sky, keep your knees in line with your toes, and launch your hips through.

In a relatively short amount of time you will see an increase in speed by integrating plyometric training and emphasizing the SSC. A comprehensive program to increase speed should include an effective warm up, speed training, plyometrics, and strength and power movements. Be sure to rest 48 to 72 hours between plyometric workouts to maximize results!


Privacy Settings
We use cookies to enhance your experience while using our website. If you are using our Services via a browser you can restrict, block or remove cookies through your web browser settings. We also use content and scripts from third parties that may use tracking technologies. You can selectively provide your consent below to allow such third party embeds. For complete information about the cookies we use, data we collect and how we process them, please check our Privacy Policy
Youtube
Consent to display content from Youtube
Vimeo
Consent to display content from Vimeo
Google Maps
Consent to display content from Google
Contact us today to learn more about our programs and services!CONTACT US